This article is part of a collection of posts on the topic of Integrated Deployment where we focus on solving the challenges around productionizing data science.
In the previous articles, we have seen how it is possible to use KNIME's Integrated Deployment approach to deploy a production workflow containing the trained model and all the required data transformations. We have shown how to manually train a model and deploy it automatically before moving on to looking at automating the retraining of a previously selected model - leading to continuous deployment.
Our previous integrated deployment examples are excellent for productionizing one single use case, i.e. one specified dataset with one specified categorical target. If you were to adapt our examples to your use case, it would work in production when the data and kind of prediction stay the same. However, if you were to add more data or even change what you are trying to predict you would find yourself reconfiguring single node settings throughout the training workflow.
Wouldn’t it be great to have an Integrated Deployment strategy that automatically adapts itself when something changes?
A rhetorical question, of course it would be nice!
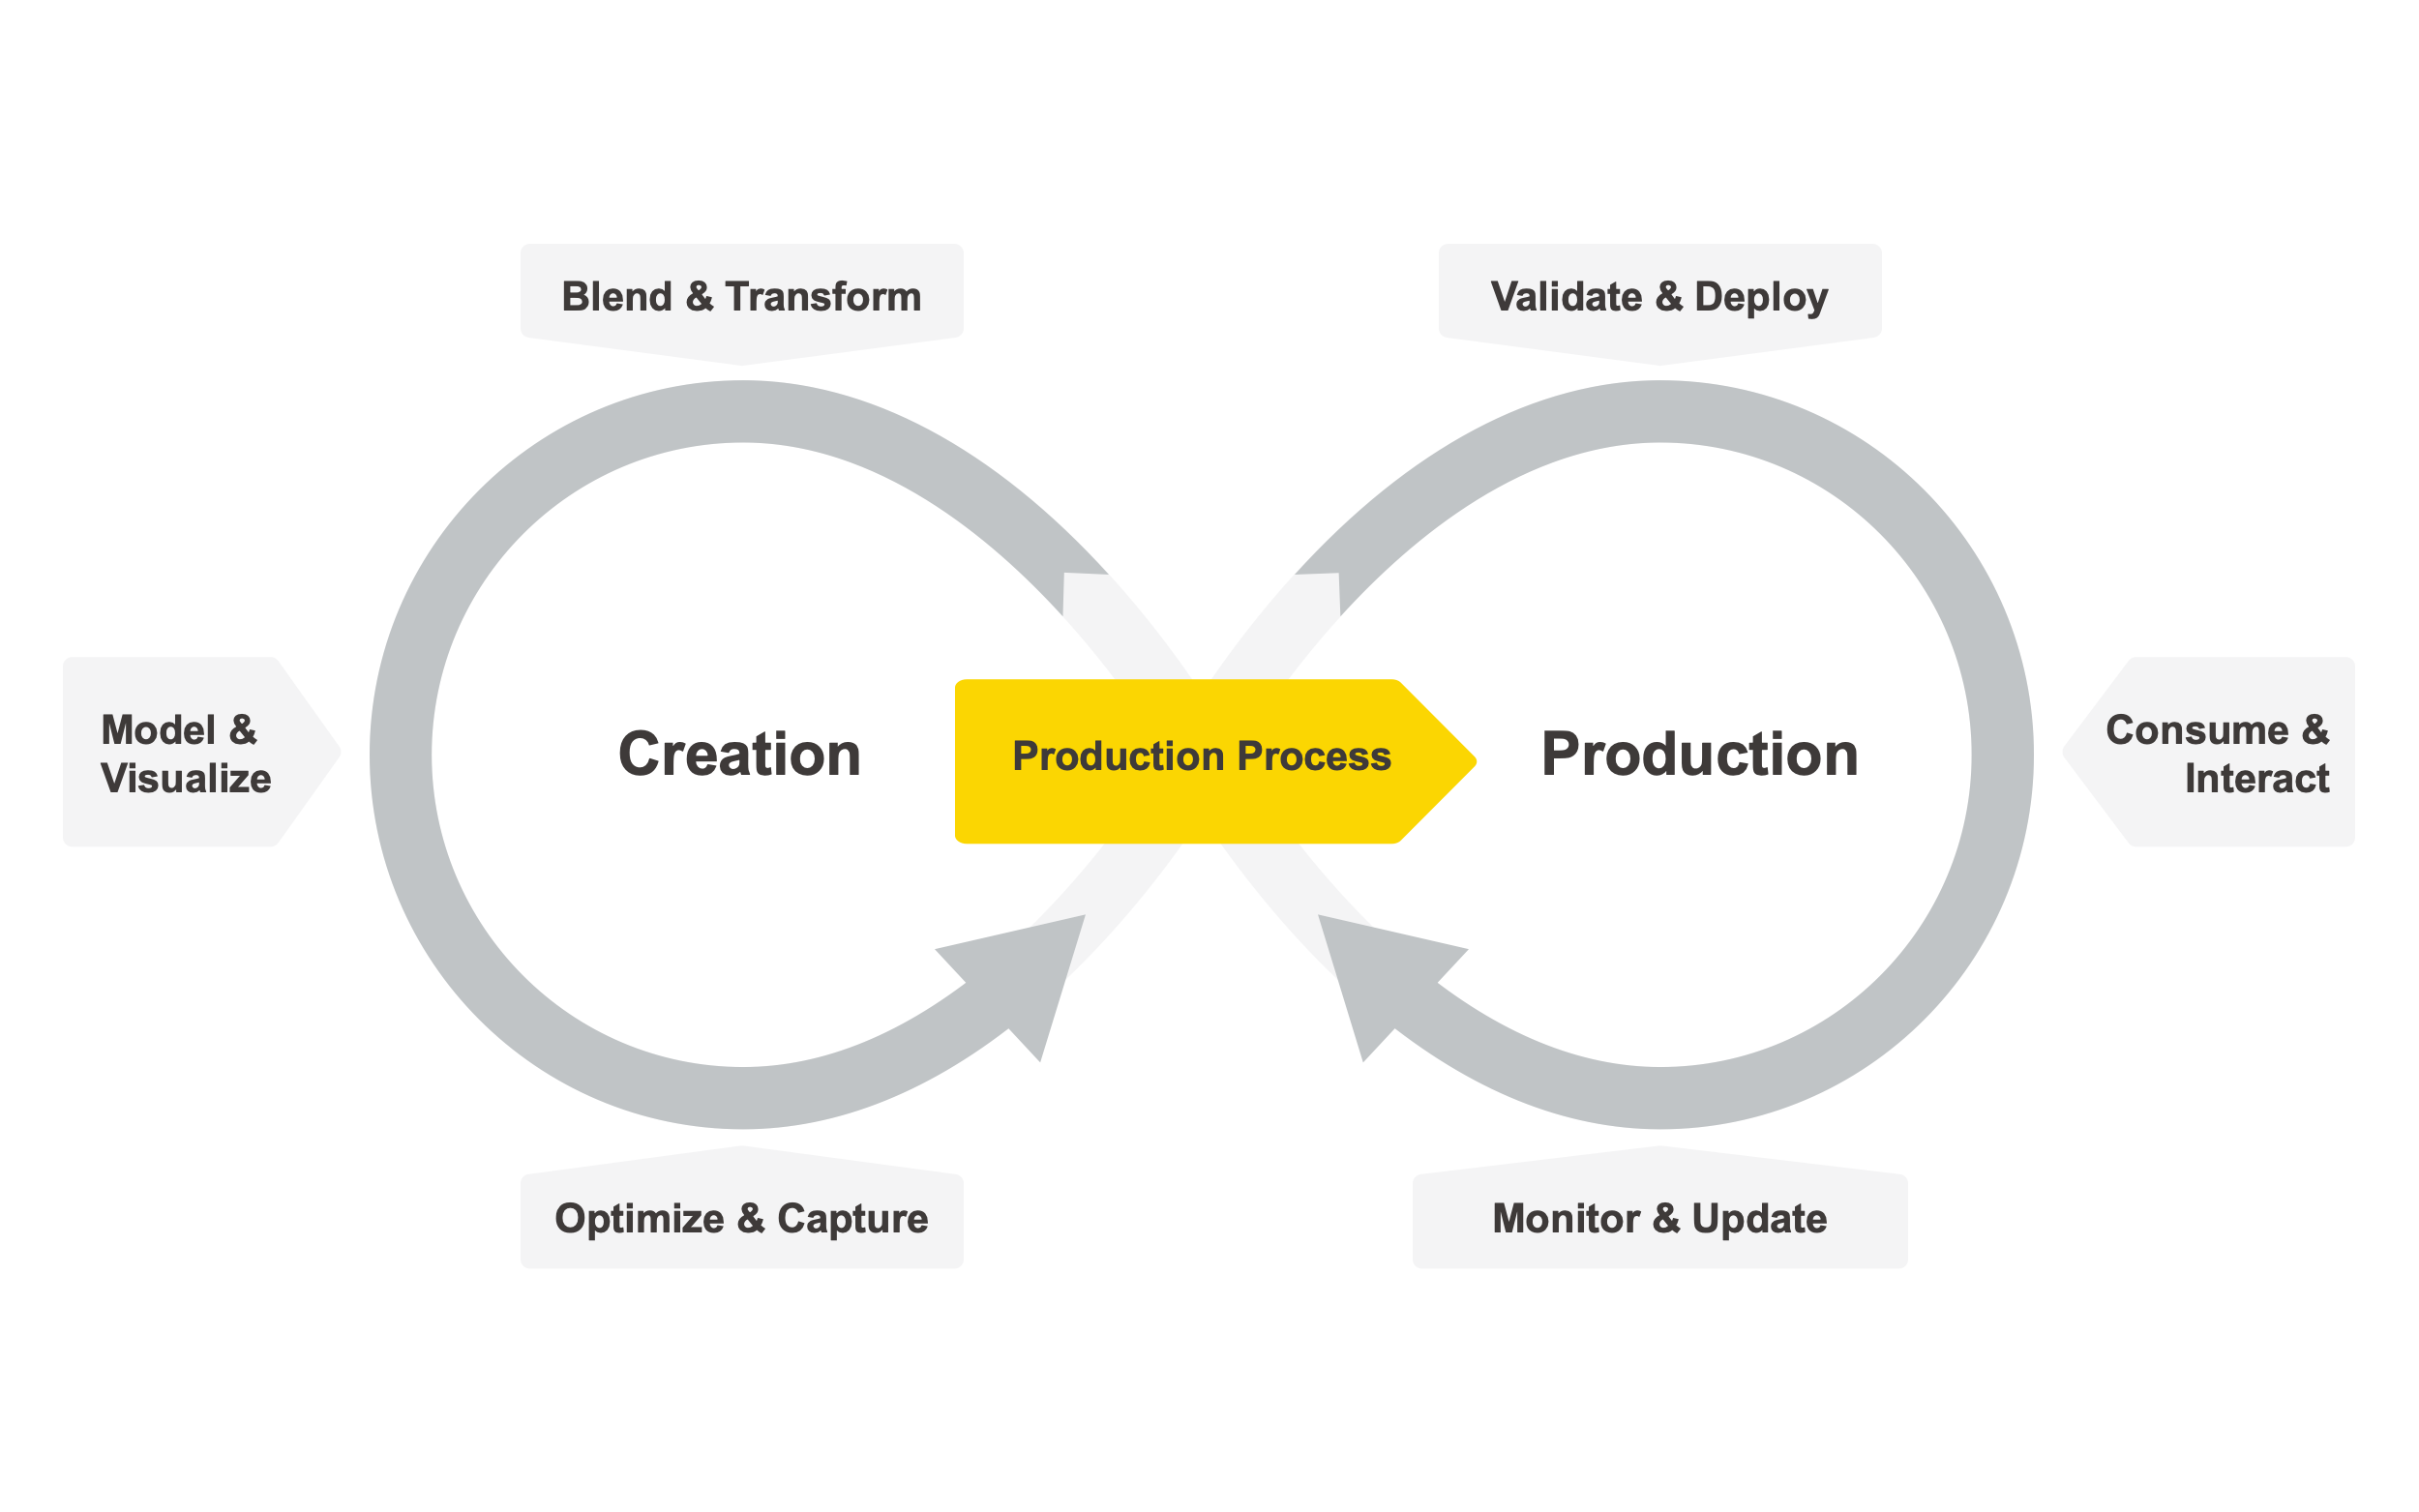
Automating the Data Science Life Cycle
We are in fact talking about an automated machine learning (AutoML) solution for training and deploying production workflows for machine learning classification. Despite their popularity, AutoML solutions can be time consuming to implement and are only effective for a subset of machine learning problems.
In 2018, we released a complex Guided Automation workflow group designed to provide detailed coverage of the various aspects of AutoML - for example the user journey, complex interactive views, feature engineering, parameter optimization and machine learning interpretability. Guided Automation is a valid blueprint for mature data science teams in need of a highly customizable approach for automated machine learning. Below, we offer a new and more user friendly AutoML approach, suited for both KNIME Analytics Platform and KNIME Server.
New AutoML component eases implementation of AutoML solutions
We have now developed a single component which flexibly automates the training, validation, and deployment of up to nine machine learning algorithms, combining them with any other required node. The new AutoML component, publicly available on KNIME Hub and part of a collection of Verified Components, can be easily dragged and dropped to your installation of KNIME Analytics Platform 4.2 or higher.
Figure 1: Animation showing the AutoML Verified Component being used.Training several ML algorithms in KNIME Analytics Platforms has never been easier. After configuring and executing, inspect the results in an interactive view to monitor progress. The selected trained model can be used on a different dataset for additional testing via the Workflow Executor node. In this example, on a small dataset, the component automatically trains and outputs a Keras Deep Learning model within a production workflow on the fly for simple demo purposes.
Open source users can simply drag and drop the new component to KNIME Analytics Platform from the KNIME Hub and configure it just like any other Learner node (Fig. 1). The executing component goes through the various steps of the AutoML procedure based on the user settings specified in the component dialogue. At the end, the component automatically selects the best available ML strategy and it exports it as a production workflow via an Integrated Deployment connection.
Best practice: understanding the output
To manually use the component’s output as a black-box classifier, the user can simply add a Workflow Executor node and provide data. It is good practice to decipher the created machine learning black-box by combining the Workflow Executor node with other nodes from the Machine Learning Interpretability Extension and compute charts and explanations for the new predictions.
Another way to understand the component output is available by manually inspecting the actual production workflow behind the model as well as any data preparation. This can be done with a Workflow Writer node. Optionally the user can already deploy the production workflow containing the model by connecting a Deploy Workflow to Server node.
The component also offers an optional interactive view (Fig.2) which allows you to not only change the ML algorithm selection but also inspect the performance of all the other models that were trained.
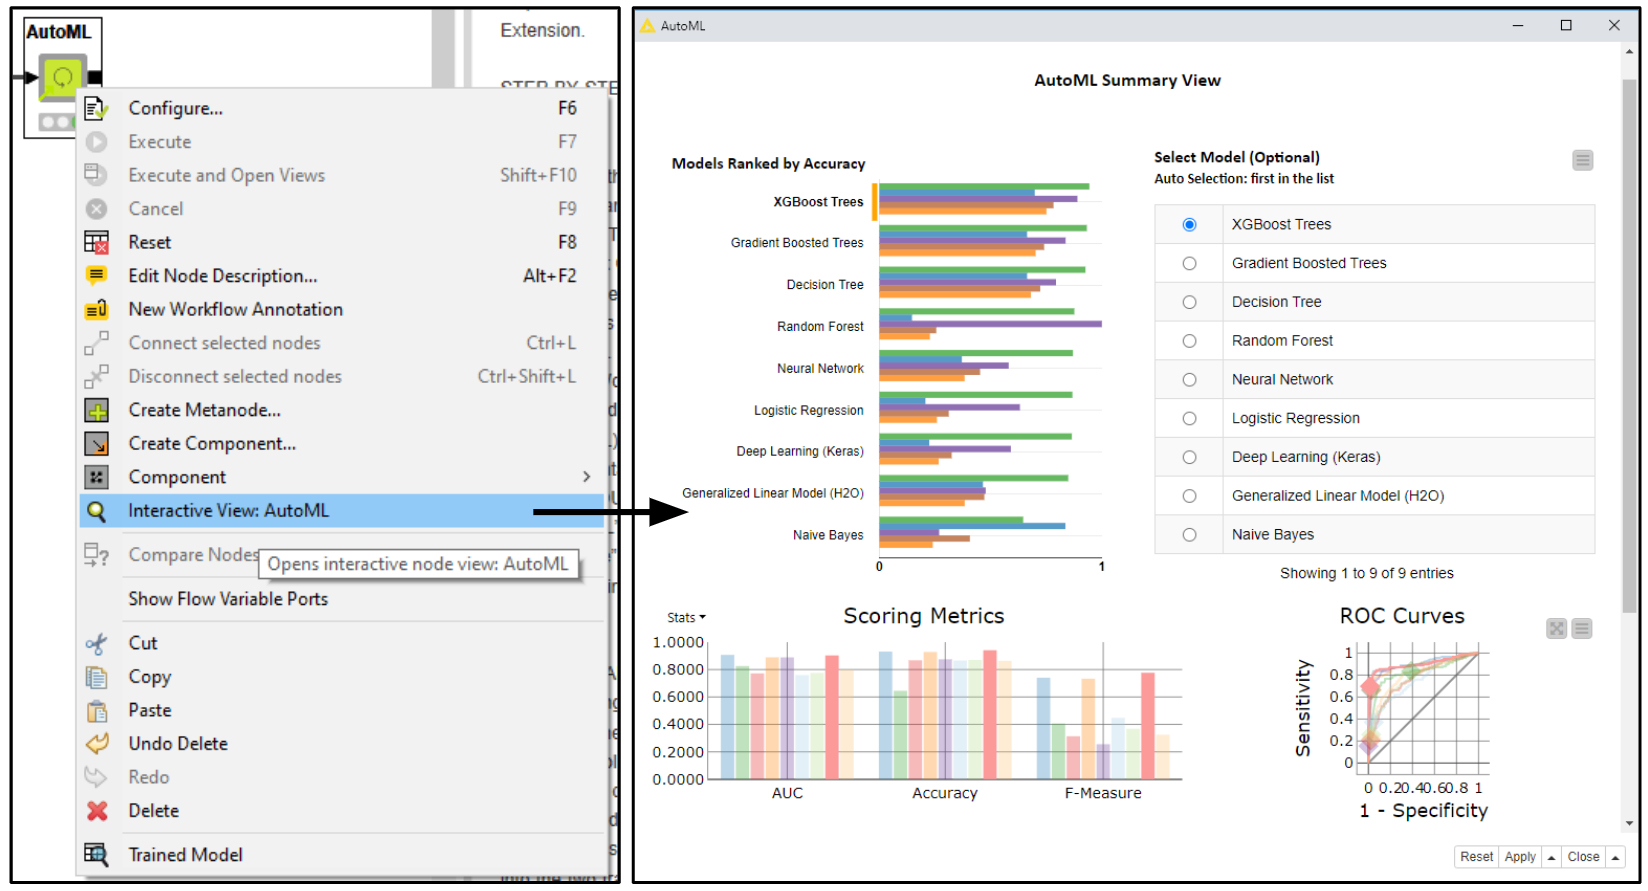
Figure 2: The interactive view generated by the AutoML component: In the top part of the view an overview bar chart of computed performance metrics is shown and a table listing all successfully trained models. Both the bar chart and table are sorted using the user defined performance metrics, in this case “Accuracy”. The model automatically selected is the top one in the table, in this case “XGBoost Trees”. To change the model exported by the component via a production workflow, the user has to perform a selection on the table and select “Apply” and “Close” in the bottom right hand corner of the view. Below a more advanced visualization is provided with ROC Curves and confusion matrices for each model (only available for binary classification).
Inspecting the training workflow inside the AutoML component
The training workflow inside the component can always be inspected and if needed customized. To organize its complexity we used so-called Nested Components for each different stage of the AutoML process.
The workflow inside the AutoML component starts with Configuration nodes. These are needed to expose settings and parameters to the user via the component dialogue (Fig. 3: A). After joining all the different flow variable settings in a single stream, the AutoML DataPrep (Fig. 3: B) handles automating missing value imputation, normalization and encoding of categorical features into numericals.
Based on the domain of the raw data and the user settings the data are prepared correctly and captured for later with Integrated Deployment. As a final step in the data preparation stage the dataset is split into train and test partitions. The prepared train data are passed to the AutoML Learner which trains the user-defined Machine Learning algorithms (Fig. 3: C1) with hyperparameter tuning using cross validation. If one of the models fails to train, by using Try and Catch Errors nodes (Fig. 3: C2), the Component discards them and keeps on training the remaining models. Once all models have been trained and captured via Integrated Deployment, the AutoML Learner exports a table storing a production workflow for each model. The said table is passed into the top port of the AutoML Predictor (Fig. 3: D); its second port receives the test data from AutoML Data Prep.

Figure 3: Illustrating the training workflow inside the AutoML component: The component dialogue (A) is generated by Configuration nodes; data preparation is automated depending on the proposed dataset and user settings in AutoML DataPrep Nested Component (B); the training of 9 different machine learning algorithms takes place in the AutoML Learner (C1) where each model parameter optimization takes place in a dedicated Meta Learner Sub-Nested Component (C2); trained models are applied to test data (D), scored against ground truth (E) and the best one is automatically selected (F). The final model is exported together with additional required workflow segments (e.g. required data preparation) as a production workflow thanks to Integrated Deployment.
Each of the models is then applied to the previously prepared test data and the predictions are passed from the AutoML Predictor to the AutoML Scorer so that the performance of each model can be measured (Fig. 3: E). Based on the metric selected by the user the best model is selected by AutoML Best Model (Fig. 3: F) and exported. Before exporting production workflow with the best model from the main AutoML component, a Workflow Combiner node is applied. We use Integrated Deployment to add pre-process and post-process workflow segments to create a perfect producction workflow. For example, adding normalization before the model and denormalization after the model. These kinds of transformations should always be combined with the model predictor node, because deploying an isolated ML model without any data preparation is, in most cases, going to fail.
The production workflow exported by the AutoML component behaves like a black-box machine learning model: raw data goes in, predictions and raw data come out. The AutoML component output production workflow always guarantees the “black-box requirements”: no matter what was selected by the user in the component dialogue (e.g. a different model or a different kind of data preparation) the exported workflow should always be able to process the raw data and append predictions at its output. This is possible thanks to the Integrated Deployment technique, which captures and combines the necessary workflow segments. For example the AutoML component is now capable of training a Deep Learning model with the KNIME Deep Learning - Keras Integration. Exporting such a complex model as a production workflow (Fig. 4) is enabled with Integrated Deployment - capturing the Keras Network Executor node alongside any other nodes thus guaranteeing the black-box requirements.
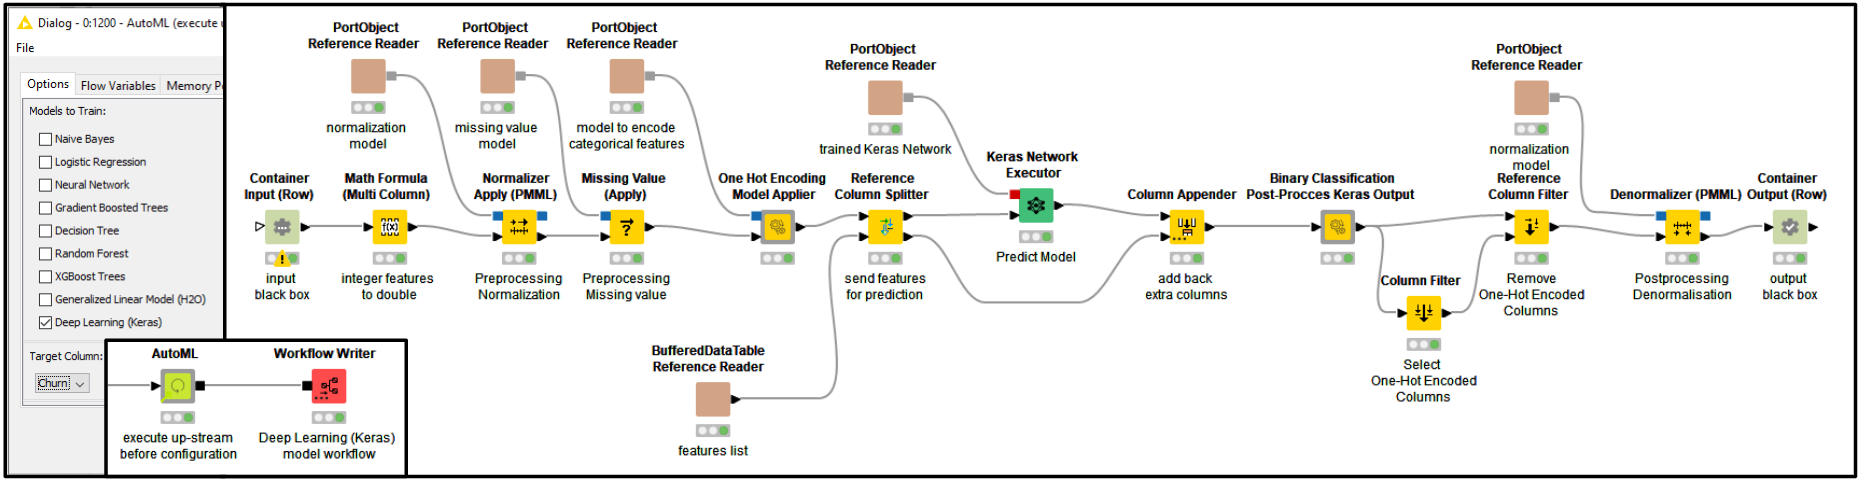
Figure 4: Keras Network production workflow: The workflow depicted was automatically created by the AutoML component. It predicts churn in an example customer dataset. The workflow was written by the Workflow Writer node connected to the output of the AutoML Component. Providing a similar result manually would require a deep learning expert - and way more than just a few minutes.
The AutoML component currently addresses supervised learning for binary and multiclass classification topics. In future, we plan to update it and to release more compatible components that use Integrated Deployment.
Tip: When you use the AutoML component yourself keep it linked to make sure it is always updated with the most recent version on KNIME Hub. Note that any new component that is released as part of our collection of Verified Components is a component developed by KNIME experts not merely as simple examples but with reliable functionalities to be used in the same way as you would use other standard KNIME nodes.
In the next episode in this blog series, we are going to use the AutoML component to create a Guided Analytics application via KNIME WebPortal. The application empowers anyone with a web browser to interactively control the settings of the AutoML component without requiring any knowledge of KNIME nodes and KNIME workflows. Stay tuned for our next episode!
The Integrated Deployment KNIME Blog Articles
Explore the collection of articles on the topic of Integrated Deployment.
Resources:
- Verified Components on the KNIME Hub plus information about them on the KNIME website.
- Presentation on Integrated Deployment in Action from KNIME Spring Summit 2020 by Michael Berthold (CEO, KNIME) - How to Move Data Science into Production