
The Gotthard Tunnel connects Italy and Switzerland through the Alps and it’s quite long – almost 15 kilometers. Driving through this tunnel feels like you might never emerge on the other end. For paid marketers, the customer journey can feel quite similar – a winding path where customers go in, and after an incredibly long time, come out the other end.
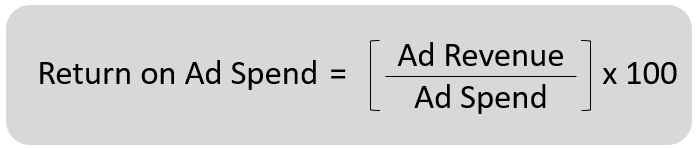
Paid marketers are charged with illuminating what has happened in between. One tactic is figuring out your ROAS, or return on ad spend. You get this metric by dividing the revenue from ads by the amount spent. In order to get these numbers, however, you have to combine data from a number of different sources.
While many marketers spend days each month or quarter figuring out the ROI on their ad campaigns, KNIME offers a way to automate this work. Once ROAS is calculated automatically, marketers can shift their focus away from reporting and toward improving their bidding strategy.
With ROAS, Reporting Speed Matters
Return on Ad Spend is a KPI that tells you whether your campaigns are delivering real business value. The problem is that because your data is typically stuck in various ad platforms – calculating ROAS is a time-consuming, manual task. Most marketing teams look at ROAS quarterly or monthly.
However, the faster you can swap out an ineffective campaign or double down on a high-performing campaign, the faster you can improve the effectiveness of a given marketing channel. This can be instrumental in building out new ad channels or even trying more types of experiments to give your product an edge in the market.
Below, find a walkthrough for your Google Ads campaigns, and follow along by downloading KNIME.
Pulling Together the Integration Pieces: What You Need Before You Start
First you’ll need a couple of details from your Google Adwords account to set up the integration. This has a bit of friction, but remember that going through this pain once, will save you many weeknight and weekend hours on reporting.
From your Google Adwords account, you’ll need two things:
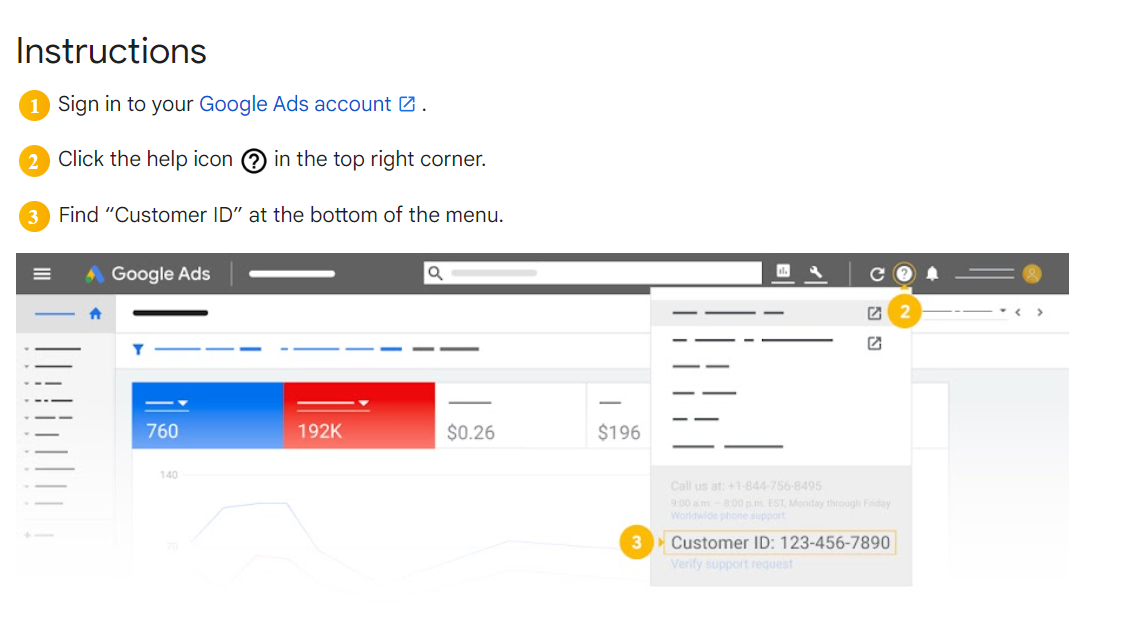
- Login customer id: You need to sign in to your Google Ads account, then click on the Help Icon. From there, you can find your Manager Account Customer ID or your Customer ID (if you have only one account with campaigns). For a detailed explanation, take a look at this Google documentation “how to find it in your Google Ads account dashboard”
- Developer Token: it’s a particular token that you need to request from Google to interact with the Google Ads API. Sign in to your Google Ads account and go to Tools & Settings. Click Setup > API Center> Apply for access > Fill and submit the form:
Note. If you get stuck, don’t panic, Google offers guidelines and templates on how to request it. Once you request it, it will arrive within 24-48 hours.
From your Google Cloud Console project, you’ll need:
- Authorization token: this is the tough part of the recipe, the gem of the dragon. But in order to get this you need to go a step back and first get an OAuth 2.0 Client ID.
- Sign in with your email company in Google Cloud Console > Enable the Google Ads API > Go Back > Create Credentials > OAuth client ID
- After that you will obtain your Client ID + Client Secret that are necessary to create the Authorization token.
- If you’re eager to get going, you can obtain a temporary access authorization token (1 hour ⌛) using the OAuthPlayground created by Google. This access token is perfect to test this workflow.
- First, you have to allow this application to “use” your Client ID & Secret previously created. Authorizing the following URI: https://developers.google.com/oauthplayground
- Now, go to the OAuthPlayground dashboard and follow the below steps to generate your authorization token:
Note. To obtain a refreshing permanent authorization token you need to follow a longer and more complex process, so if you are interested in it, stay tuned!
Automating Our ROAS Calculation
Now that we’re done with the bureaucracy, we can start to build our application.
KNIME, as a no-code/low-code data analytics platform, has an easy-to-use visual environment that lets you build applications without any coding. You drag and drop each step – we call these steps “nodes” – of the process into your workbench to create a data flow, i.e. a process of what happens to the data.
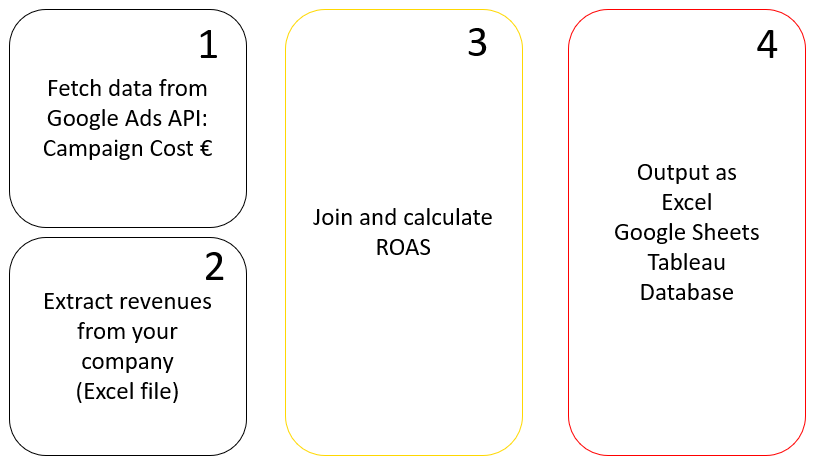
We can break down our objective into 4 steps as it is shown below. If you were a code master you could write a long script to accomplish all these steps. Instead with KNIME, you can simply drag and drop nodes to handle each step of the process, to build a workflow.
This graphic shows the 4 steps to build our ROAS calculator.
This screenshot shows those 4 steps “translated” into a KNIME workflow.
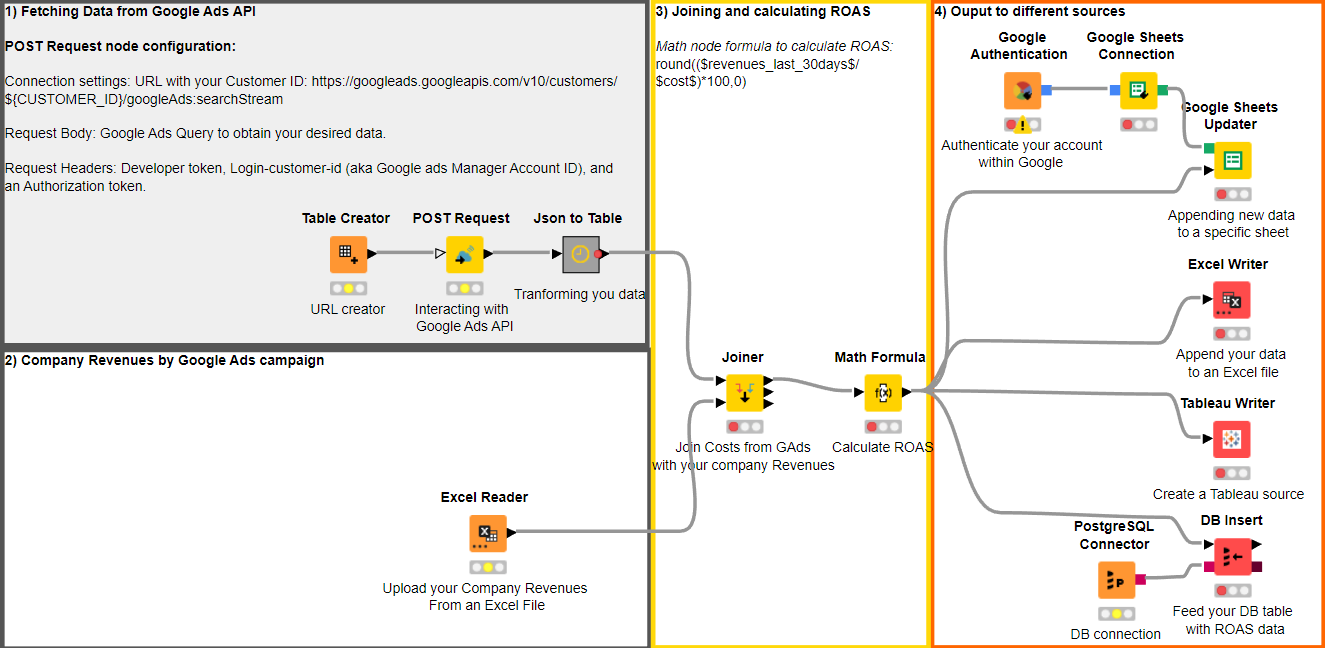
In the next part of the article, we walk you through configuring the KNIME nodes to create the complete workflow!
1. Get the data from Google Adwords API
Drag the Table creator node into your workbench. It creates a table with the URL that you need to “call” the Google Ads API. In our example the URL is: https://googleads.googleapis.com/v10/customers/${CUSTOMER_ID}/googleAds:searchStream*
Note. If you have more than one GAds account within your main Google Ads account you need to add the Viewing customer ID here!! Click Help in your GAds dashboard to see this information.
The next node in the sequence is the POST Request node which does the magic 🧙♂️ It calls the Google Ads API, telling it that we need to know how our Gads campaigns have performed during the last 30 days and returning us the right answer. Let’s look at how to configure the node:
Here's a summary of what you need to provide into the POST Request node:
- Connection URL with your Customer ID inside
- The Google Ads Query body request to obtain your desired data. In our case this is:
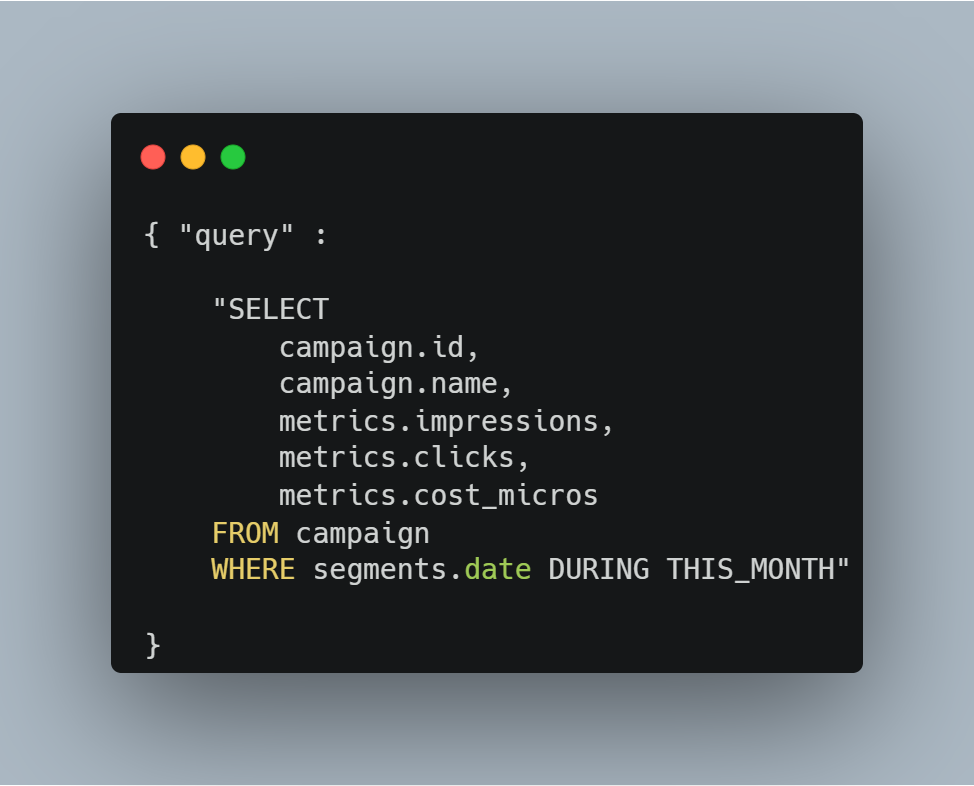
Tip: If you don’t know how to compose those queries don’t worry there is a Query Builder available that helps you to obtain what you need.
- Request Headers: Developer token, Login-customer-id (aka Google ads Manager Account ID, and an Authorization token.
2. Obtain Company Revenues by Google Ads Campaigns
We now want to upload our company revenues from an Excel file with the Excel Reader node. It is simple as it sounds, with this node you can read any specific sheet from an Excel file, let’s take a look with a dummy example:
3. Join and Calculate ROAS
In order to calculate ROAS we first need to join the costs of the GAds with our company revenues. The Joiner node nodes this. We just need to configure it.
In our example we are using the “campaign_name” column as a joiner key, as this column is present in both tables. You can see how it works in this short video:

Now that our data is joined, we use the Math Formula node to reproduce the ROAS formula. Double-clicking the node, we want to access the Math Expression tab to insert this formula:
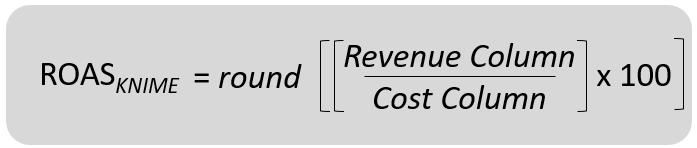
We can now drag and drop the pieces of the formula we need into the Expression box from “Column List” (which lists the columns in our table) and “Category” (which gives us all the different operators we need to build the formula) The final formula looks like this: round(($revenues_last_30days$/$cost$)*100,0) 👇🎥
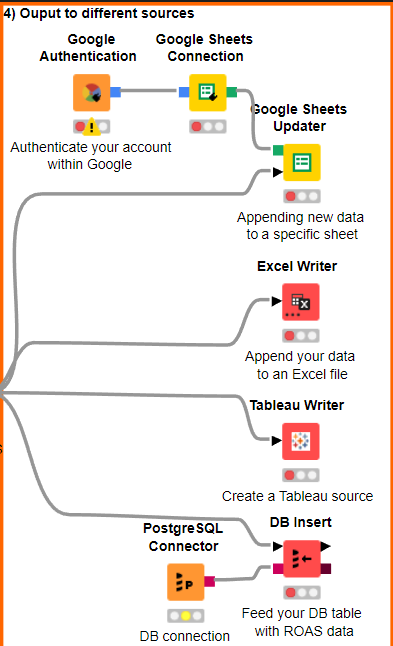
4. Send Output to Required Locations
We are finally done. Now you can send your Output wherever you want. For example you can update a google sheet with your ROAS calculation, append your results from the last month to an Excel file, deploy to Tableau, or send the calculation to a database table in your data warehouse.
Refine Your Marketing Strategy with Timely ROAS Reports
Once your ROAS calculation workflow is set up with a permanent Google access authorization token you can schedule the workflow via KNIME Server to run regularly and send reports to your team. Automating the calculation of this metric means you can run multiple campaigns and still easily monitor how they are performing. This timely information can help refine your ad campaign strategies. The analysis can also be made available to team members via a browser-based data app. You can configure the data app to enable colleagues to manage and monitor Google Ad campaigns.
This workflow could be the first piece of a bigger KNIME environment that allows you to orchestrate your Google Ads campaigns connecting them with CRM platforms such as Salesforce and create target CPA and target ROAS strategies.
Download the workflow to try this out with your own data.