
Cheminformaticians deal with humongous volumes of chemical data. Before we can analyze the data and extract useful information, it has to be standardized in order to be stored accurately and consistently. This painfully slow and cumbersome process is made a lot easier and faster with tools like the ChEMBL structure pipeline, which automate normalizing molecules.
But in multi-discplinary teams not everyone codes. That’s why open data science tools – which allow everyone to collaborate and share solutions easily and flexibly – are so useful: they let us all benefit.
At the recent KNIME Spring Summit, I attended an online workshop about building custom functionality in KNIME with Python. The functionality I have with the ChEMBL structure pipeline isn’t available in KNIME Analytics Platform, so I wanted to see if I could develop a custom node in KNIME that would clean my chemical compounds data using the Python ChEMBL library.
I wrote about how I built the node on my blog, which we’ve reposted below. My new ChEMBL structure pipeline node takes SMILES strings as an input, standardizes molecules from SMILES and generates a molecular hash as an output.
To sum up my first impression of developing a KNIME node in Python, I would like to mention three main benefits:
1. Easier managing of Python dependencies
Sometimes keeping track of Python environments for managing Python dependencies can be a pain, especially when you want to share work with colleagues. I find KNIME’s Conda Environment Propagation useful, as it snapshots details of the environment you’re using and propagate them to any new execution location.
2. Easier sharing of logic
For cheminformaticians who write code, like me, my new ChEMBL structure pipeline node can be managed by a version management system like github. I can share the logic with my colleagues and they can easily modify the code.
3. Easier sharing of functionality
Colleagues who use KNIME but are non-coders can now add my node to their own workflows, or even download the entire workflow to use themselves.
Share and Improve Functionality with the Open Source Community
As a passionate RDKit user, I appreciate how open source communities develop and share new functionality. KNIME has a nice user community. I believe that sharing these kinds of activities promote the “give and take” philosophy. When I share the node on the KNIME Community Hub, other people can download it and use it themselves. But sharing functionality isn’t only giving. It can also mean receiving useful feedback from the community, which helps to improve our solutions. I like this structure.
Read on to see my article, originally published on my blog Is life worth living.
Developing a new KNIME node with Python
I recently watched the KNIME Spring Summit to hear more about the new features in the software. It’s really cool. I’m interested in node development with Python. In previous versions of KNIME, you can develop your own nodes, but this required using Java. Now we can develop custom functionality with Python instead of Java.
Note. This is supported from KNIME version 4.6. You can read about the details described in the article, Four Steps for Your Python Team to Develop KNIME Nodes.
I read the blog post and set about developing my own KNIME cheminformatics node. I wanted to build a node to standardize molecules with the chembl_structure_pipeline. This library is really useful for normalizing molecules.
The following section shows my log.
At first, I got template code(basic.zip) from here.
The structure of the zip file is below.
I modified config.yml and my_conda_env.yml below.
How to define the config.yml is well documented in the blog article, 4 Steps for your Python Team to develop KNIME nodes.
After defining the my_conda_env.yml, I made conda env with the yml-file.
After making the env, I wrote the code for the KNIME node. My node get smiles strings as an input then standardize molecules from SMILES and generate molecularhash as an output.
The code is below. Decorator is used for making input and output. The following code defines one input port and one output port. You can add additional ports with @knext.input_table and @knext.output_talbe decorators (https://knime-python.readthedocs.io/en/stable/content/content.html#python-script-api ).
After writing the code, add this one line to knime.ini which is located in knime install folder: “-Dknime.python.extension.config=/home/iwatobipen/dev/knime_dev/basic/config.yml”.
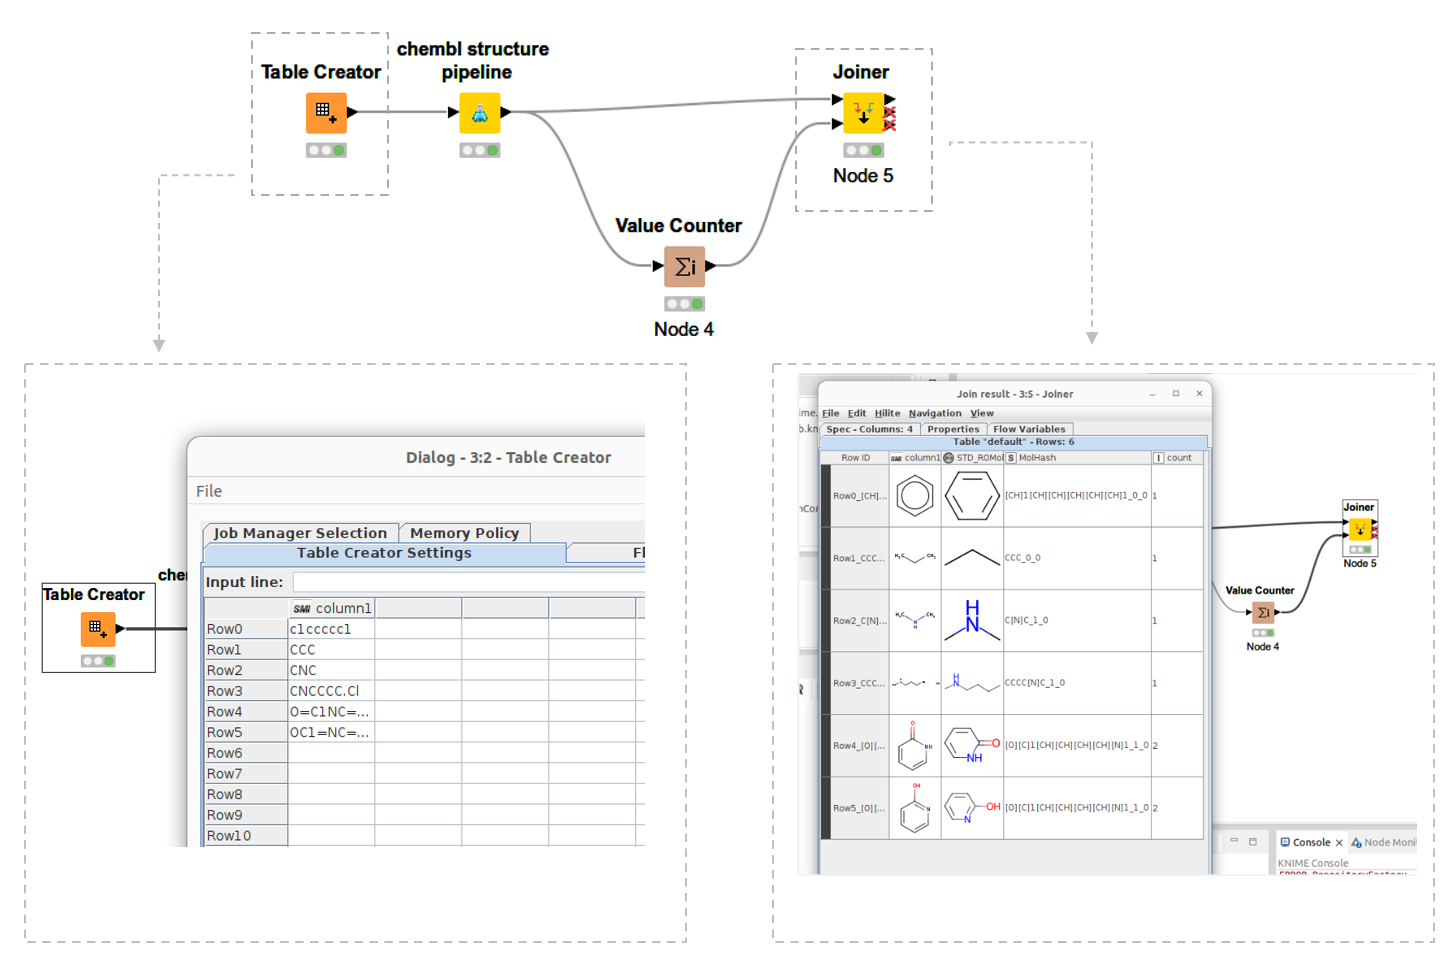
Next, I launched KNIME and could see my own KNIME node. You can see the simple workflow I made in figure 1, above, and see how it shows my newly developed ChEMBL structure pipeline node. I added some SMILES from the Table Creator node. Now, when I run the node, I get standardized molecules as the output.
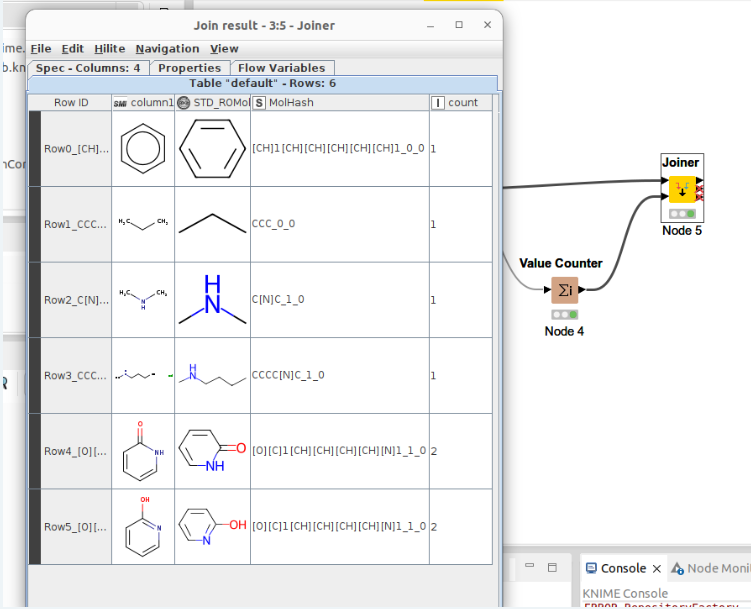
The workflow not only standardizes molecules but also generates molhash. You can see the output below. Count row is count of molhash. It can see count 2 in 2-hydroxy pyridine and pyridone. Of course they are tautomer.
Developing this new node with Python was an useful experience for me. And I can now share the functionality with non-coders!