Is data science easy to learn from scratch? The answer depends on your tool of choice: If you start with coding it'll be difficult. If you start with low-code, you can dive right into the concepts without needing to learn the basics of coding first. You can start building data science applications right away.
KNIME Analytics Platform is free and open-source software that you can download to access, blend, analyze, and visualize their data, without any coding. Its low-code, no-code interface makes analytics accessible to anyone, offering an easy introduction for beginners, and an advanced data science set of tools for experienced users.
So, maybe you’re curious to try it KNIME, but you really don’t want to sit through another course, watch a series of videos where the suggested exercises are often too easy for you. Can’t you just start building workflows? Just get started? Then you are in the right place! Fasten your seat belt, the workflow building begins now!
Get started in the Beginners space
We have created a Beginners on KNIME Community Hub just for you, itching to build workflows. Inspired by the "Learning by Building" approach, we have assembled a collection of example workflows as a starting point. Just install KNIME Analytics Platform, open it, drag and drop the workflow of interest from the Beginners space on the KNIME Hub, and start tweaking it to fit your data and problem.
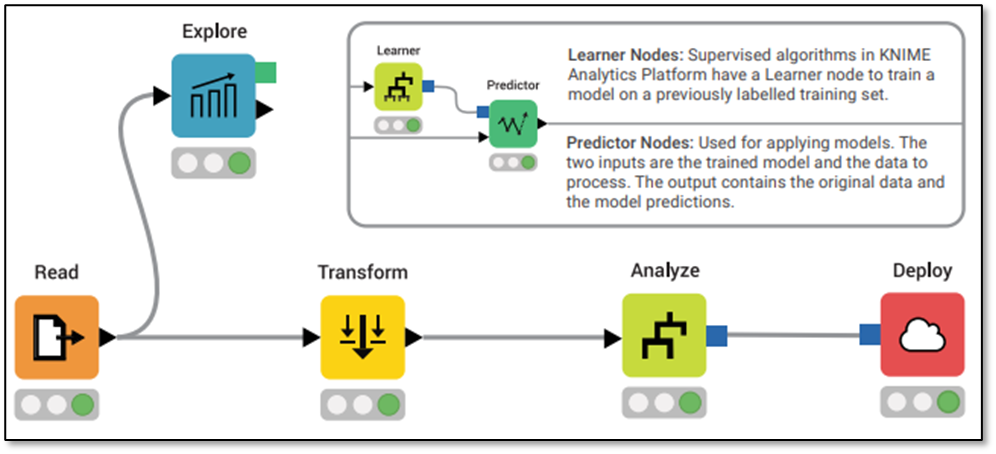
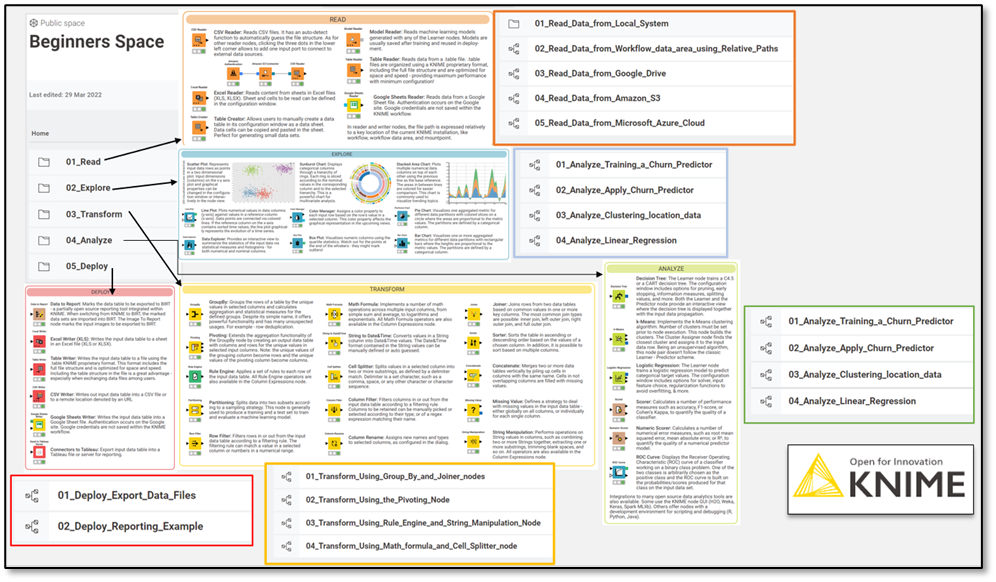
We’ve designed the Beginners space to be used in tandem with the cheat sheet, Building a KNIME Workflow for Beginners. The cheat sheet gives you short, succinct tips for all the basic steps to building workflows: Read, Explore, Transform, Analyze, and Deploy (Fig. 1). To match the cheat sheet, the Beginners space has folders containing workflows for each of these categories (Fig. 2).
How to use the Beginners space
Step 1. Download and import the workflows of the Beginners Space, either in bulk or one by one.
-
Just drag and drop the workflows from KNIME Hub page to KNIME Analytics Platform as shown in Fig. 3 (a)
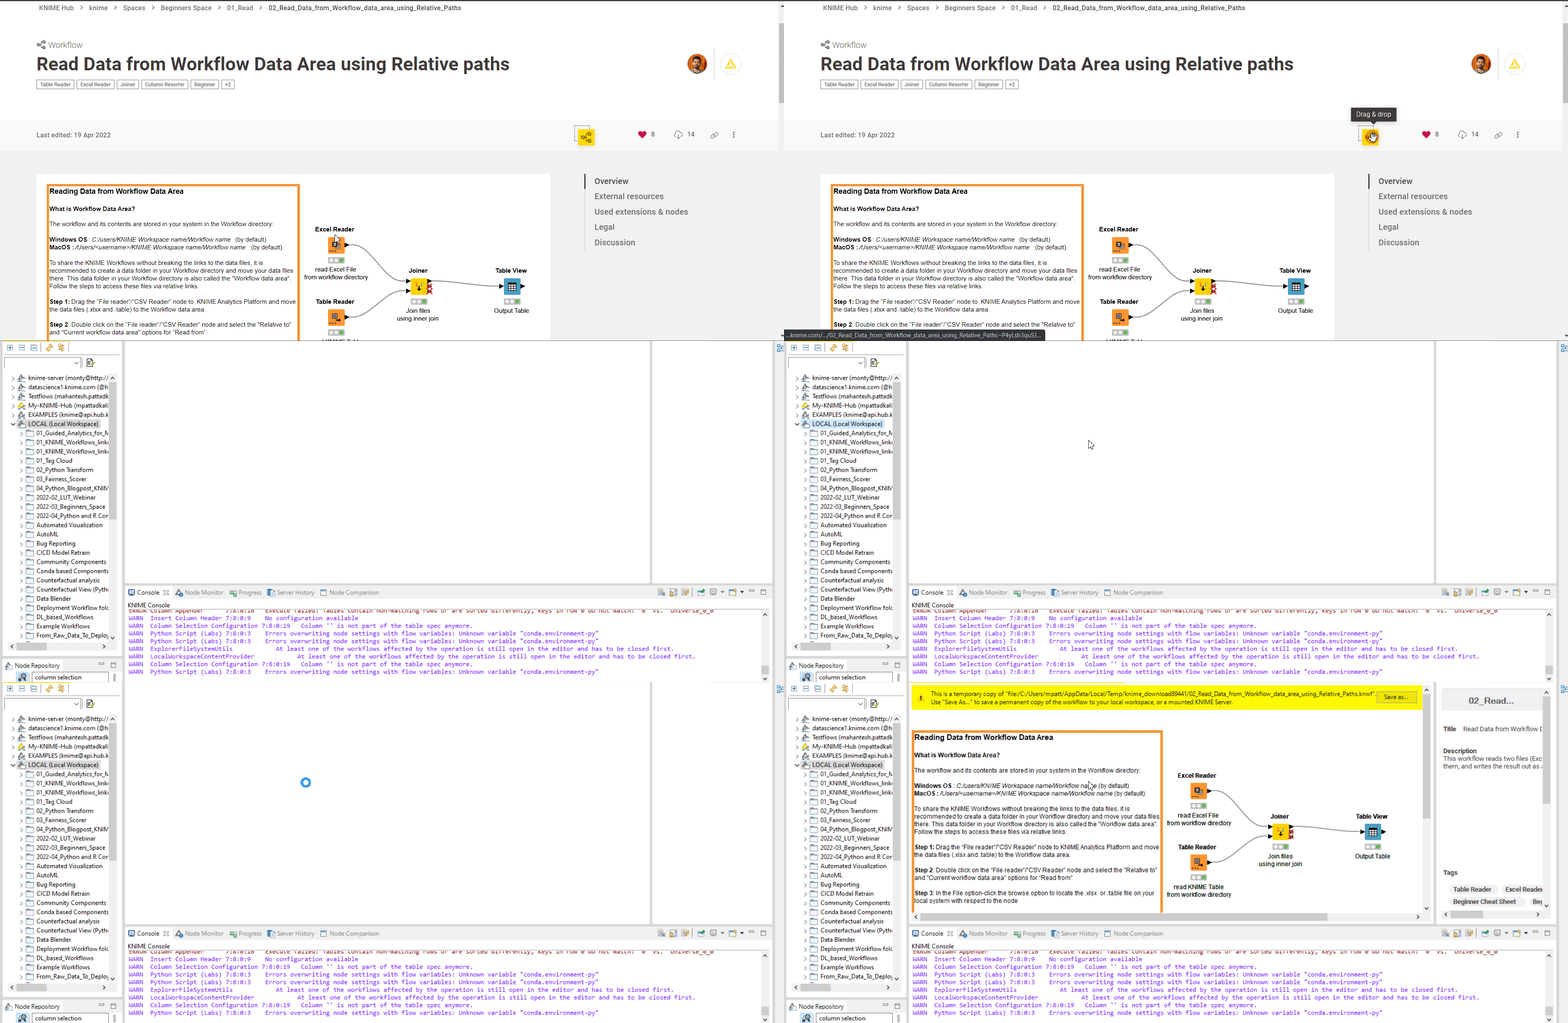
-
Alternatively, download the set of workflows or specific workflows by clicking the Download icon as shown in the gif in Fig 3 (b)
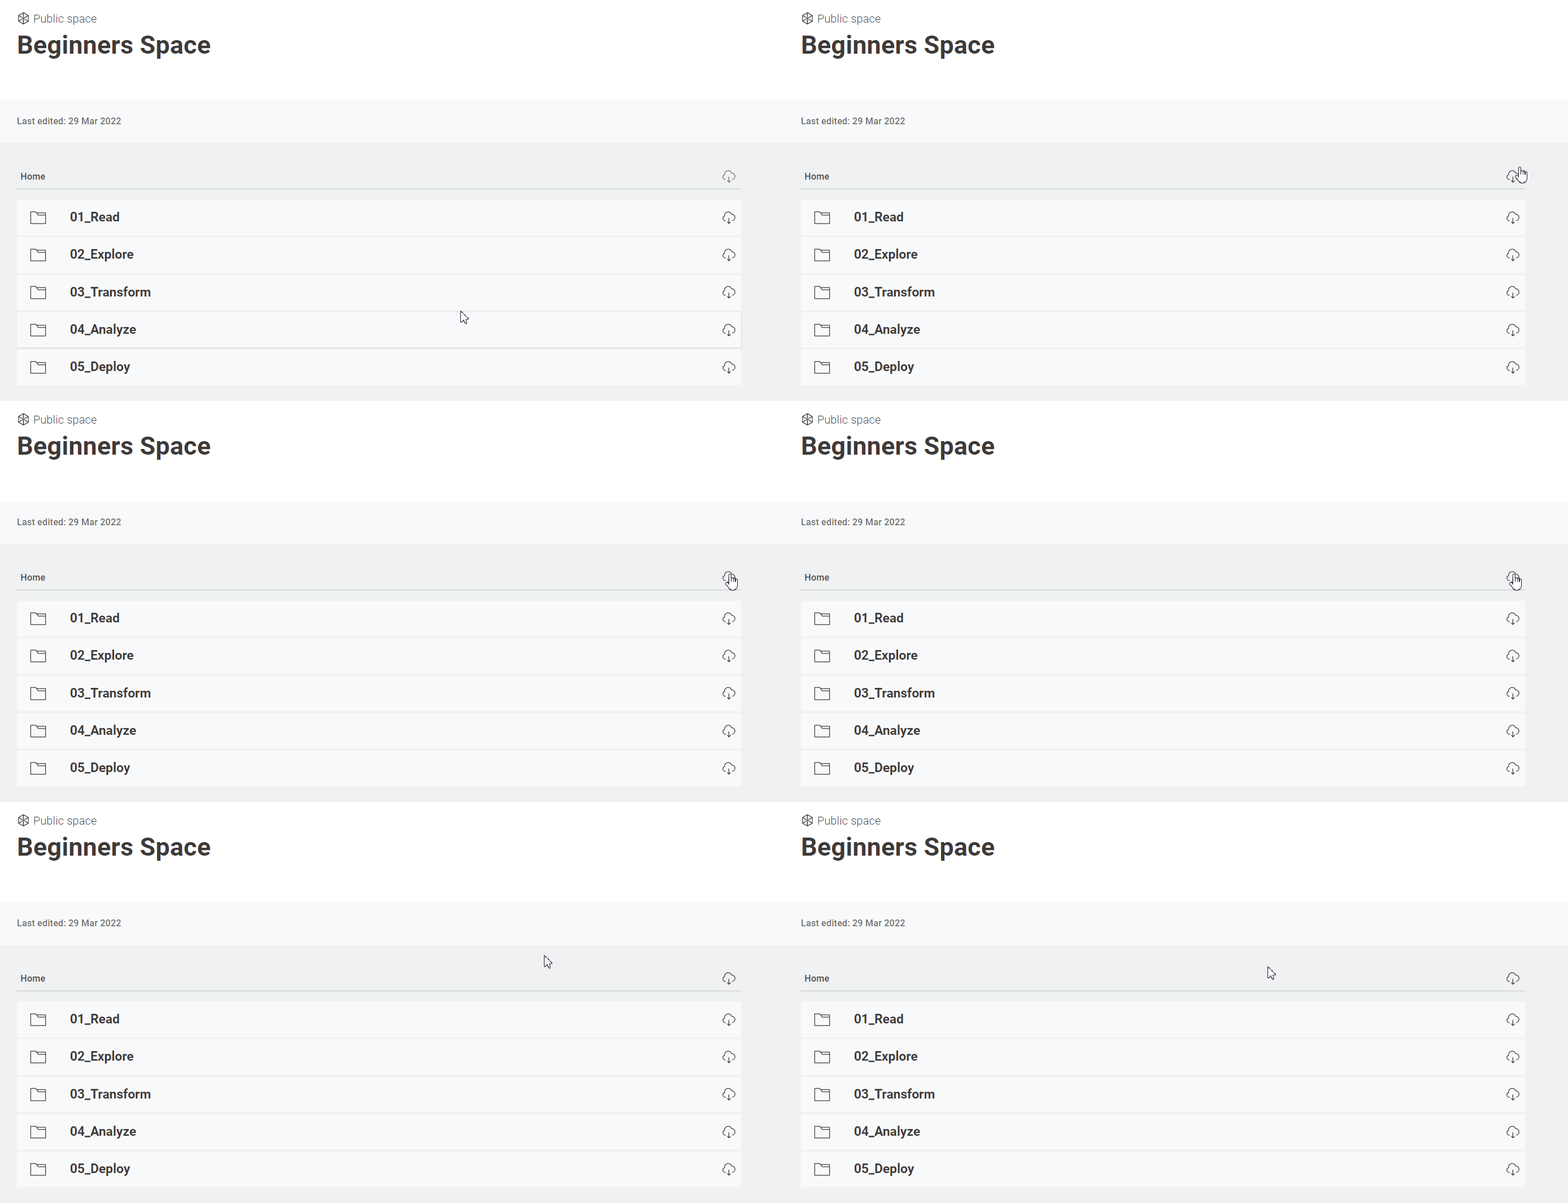
- Now, from KNIME Analytics Platform, select ”Import KNIME Workflow..” from the File menu and browse to the downloaded .knar file in your system.
- After importing the file, you should see the whole folder or the single workflow in the KNIME Explorer panel in the top left corner of the workbench.
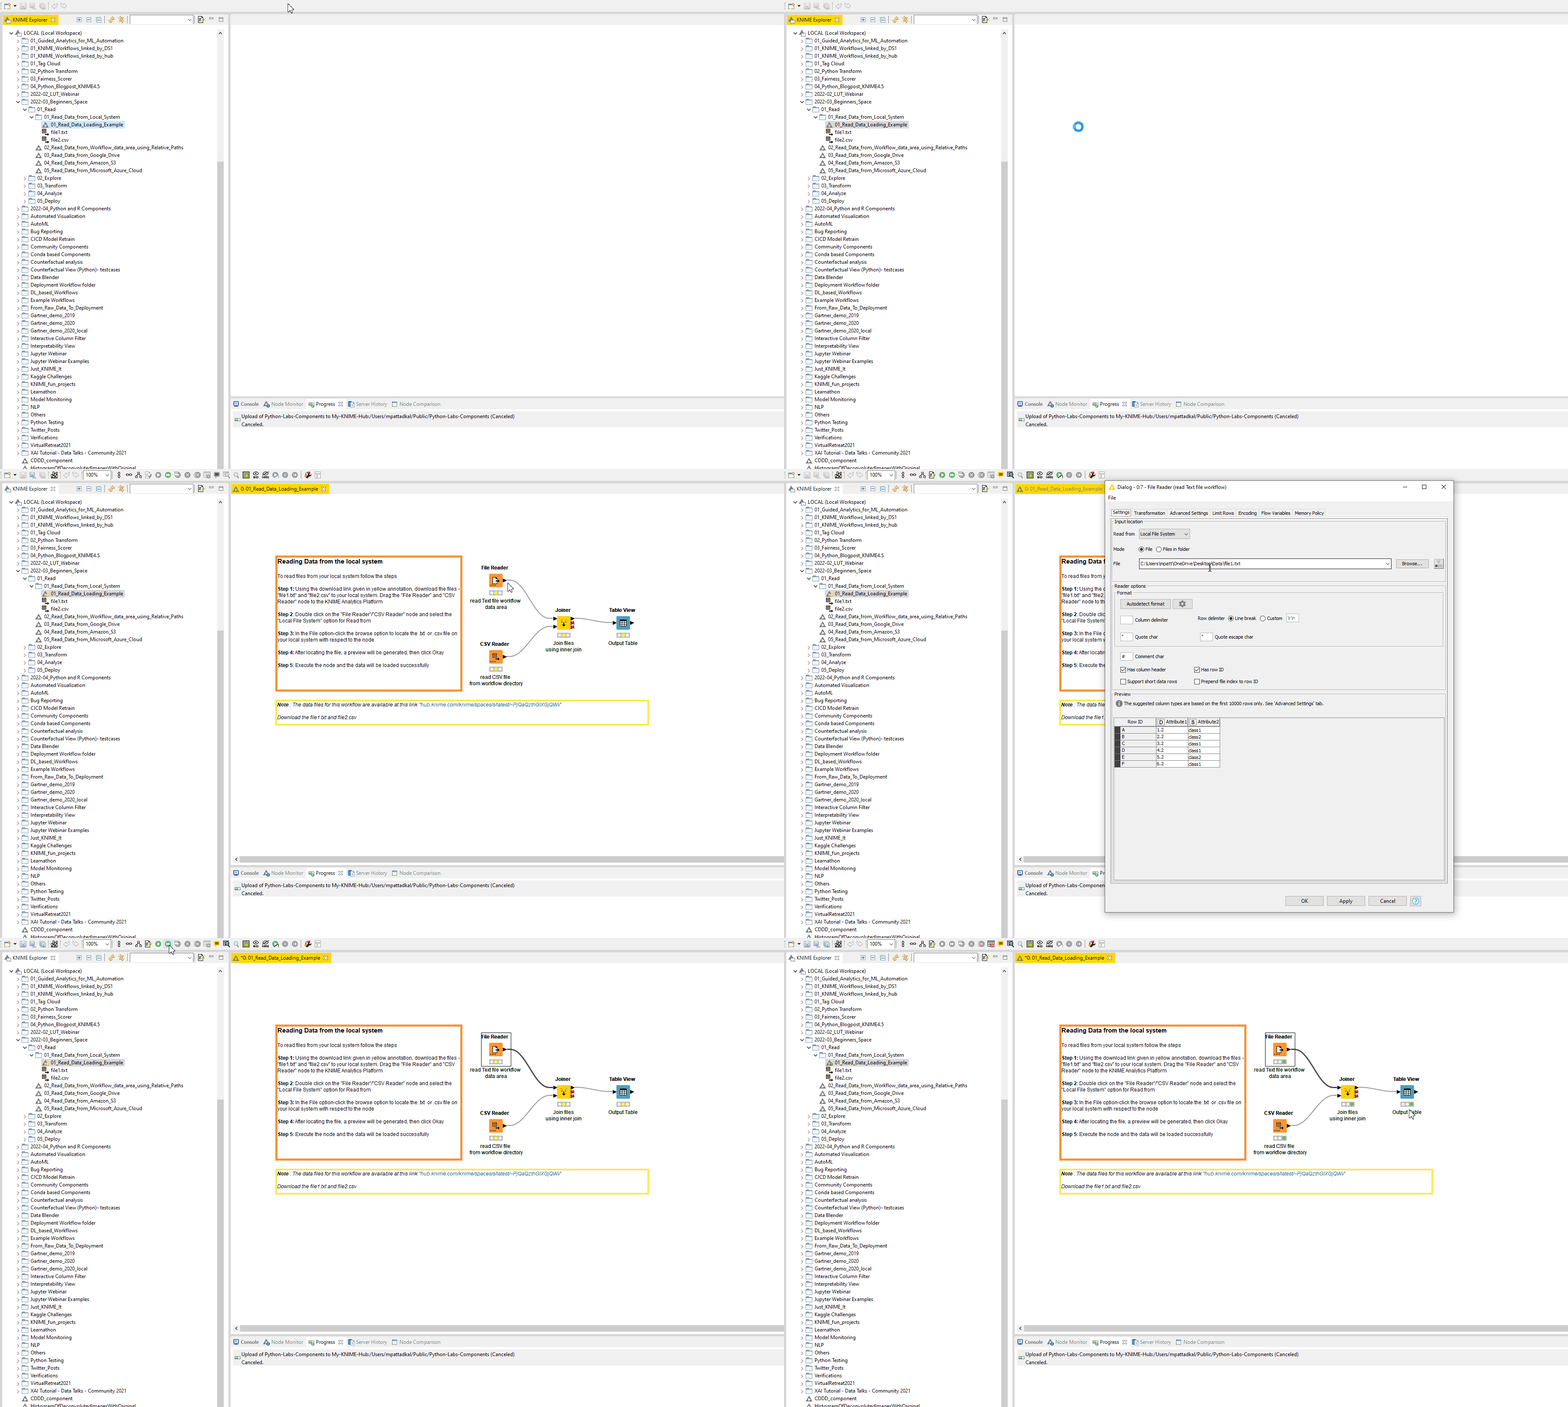
Step 2. To open the workflow you want to start using, double-click it in the workflow editor. Let's start for example with the 01_Read category.
Step 3. Execute the entire workflow by clicking the green arrow in the toolbar, or choose to execute the workflow node by node, by right-clicking each node and selecting “Execute”.
Step 4. To change the input data, double click the Reader node and change the path to the data. Experiment with a different path and connection options.
You can see these steps demonstrated in the GIF in Figure 4.
Step 5. Explore all other categories in the same way: open, edit, and execute, not necessarily in that order.
Tip: If you fancy learning KNIME by solving challenges, have a look at our “Just KNIME It” Challenges, which help you to practice your workflow building skills by solving weekly challenges.
You're now ready to build workflows yourself
We are actively involved in creating content that makes it easier for you to learn KNIME and start building workflows suitable for your use case. The question we often hear during our many courses, lectures, and tutorials, as well as in interactions with KNIME beginners or posts on the KNIME Forum, is: “Which nodes or workflows should I use to start learning KNIME?”. This has helped us to understand that beginners enjoy learning KNIME by building or experimenting with workflows. That is how our work on the Beginners space has come about: a collection of simple workflows that you can drag and experiment with to accelerate your learning process.
