
You’ve always been able to fine tune and modify your networks in KNIME Analytics Platform by using the Deep Learning Python nodes such as the DL Python Network Editor or DL Python Learner, but with recent updates to KNIME Analytics Platform and the KNIME Deep Learning Keras Integration there are more tools available to do this without leaving the familiar KNIME GUI.
Today we want to revisit an older post, from January 2018. The original blog post looked at predicting cancer types from histopathology slide images. In today's article, we detail how we can transfer learning from the convolutional neural network VGG16, a famous image classifier, into our new model for classifying cancer cells. In the older workflow, Python scripts that might not be simple to write for those of us not intimately familiar with the Keras library in Python are now handled with just five easily configured KNIME nodes. You can see the old blog post, 'Using the new KNIME Deep Learning Keras Integration to Predict Cancer Type from Histopathology Slide Images' by Jon Fuller here.
Note: To run this workflow you will need to install the KNIME Deep Learning Keras Integration. Follow the instructions in the link to get ready!
Histopathology: Reading images and training a VGG
This article looks at the workflow 'Read Images and Train VGG', which you can find and download on the KNIME Hub here .
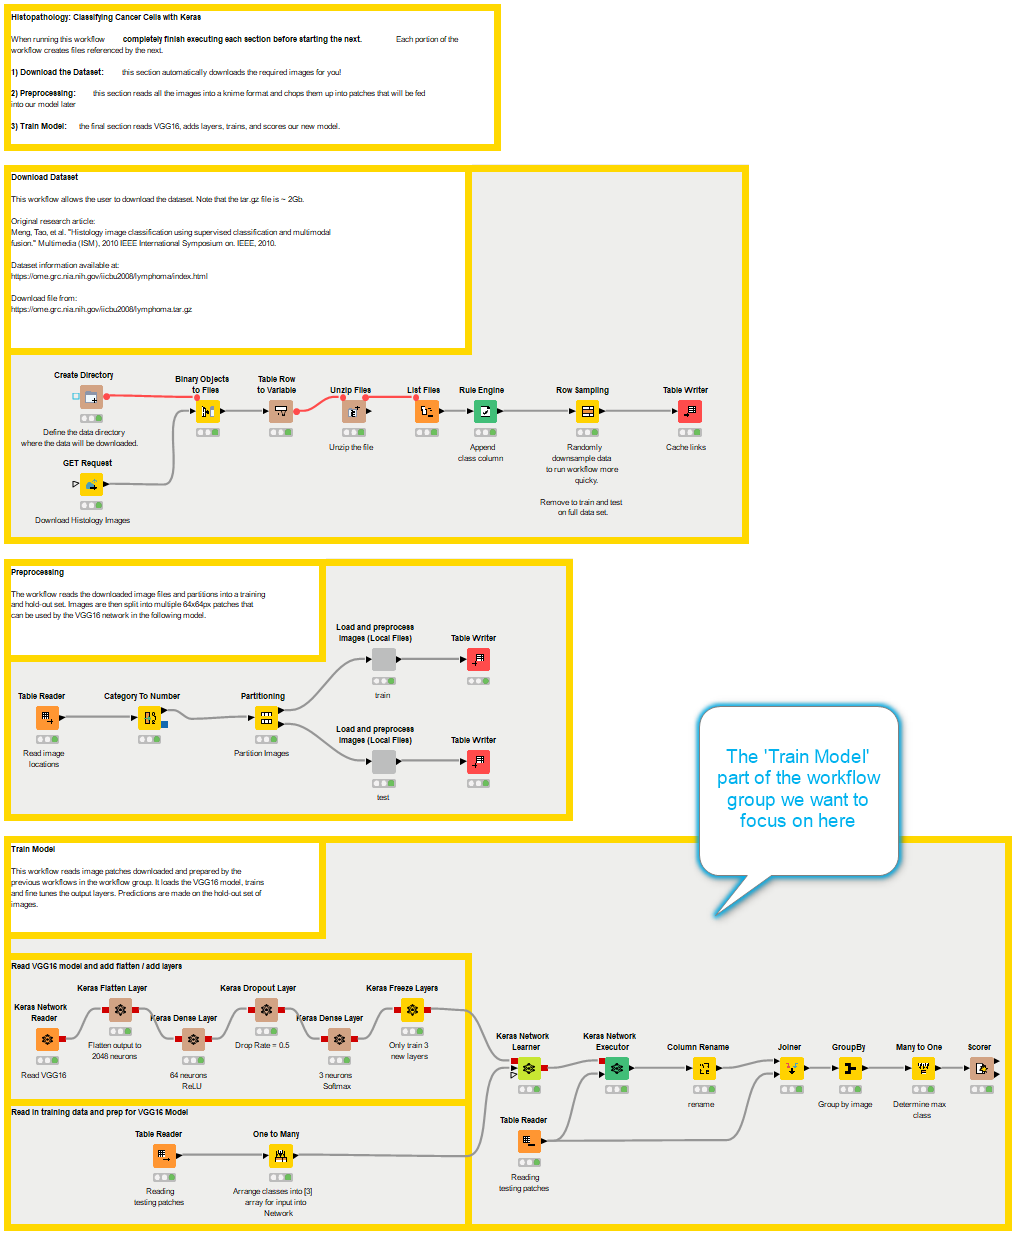
The 'Train Model' workflow is part of the 'Read Images and Train VGG' workflow group, which downloads the dataset, preprocesses the images, and trains the model.
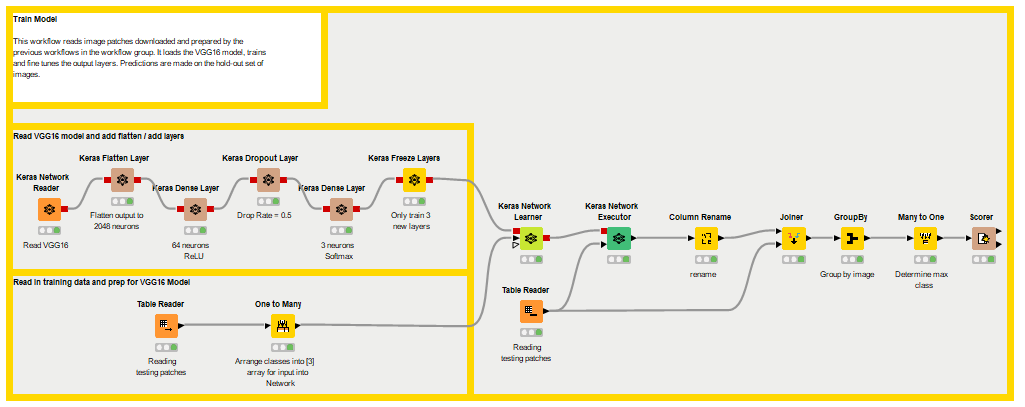
In the figure below you can see the Python script that would be required to flatten, add layers to, freeze, and train the new model.
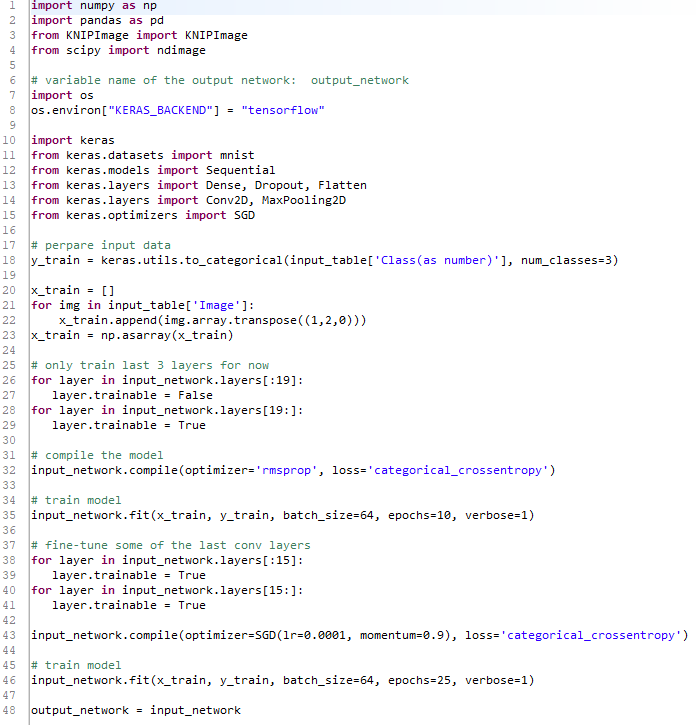
Now as far as coding goes that’s not too many lines, but what if you wanted to collaborate with a colleague who isn’t familiar with Python or the Keras library, or if you wanted an easy graphical interpretation for a presentation? That’d be a bit of extra work. So instead, we replace the Python script with these KNIME nodes.
The Keras Integration nodes explained
This is much easier to understand at a glance, thanks to the node names, telling you what each one does plus the notes underneath each node, giving you additional information. All of these nodes are also easily configured! We’ll walk through them now to get you familiar with some of the Keras integration, so you can go out there and start building your own custom networks or applying a transfer learning strategy like we do here on your own!
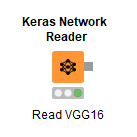
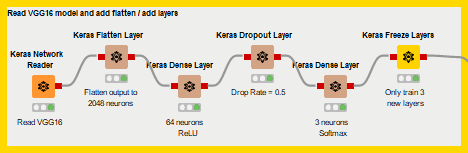
The first thing we do here is run the Keras Network Reader node. This node reads in an .h5 file for a complete network with weights, or a .json or .yaml file to import only a structure. We’ve set it to read an .h5 version of the trained VGG16 model because we want to use all the intelligence that has been embedded inside that network and repurpose it to classify those cancer cell slides from the prior blog post.
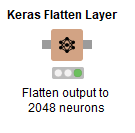
No surprises with this node here, we’re just flattening out the prior layer in the VGG16 model in preparation for the extra layers we’ll add next. There’s not even anything to configure! Unless you want to give this a layer a custom name… which might be helpful in a moment.
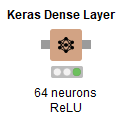
Now we finally start doing something, this node will add a layer on top of whatever Keras network you plug into it’s input port - that’s what all those gray boxes you’re seeing represent. You can select the number of layers as well as what kind of activation function you want to use for the neurons. In this case we’ve set 64 neurons with the ReLU function.
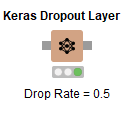
Now this node doesn’t actually add a new layer but applies dropout to the prior layer, in this case our 64 neuron ReLU layer. What it will do is zero out a fraction of the input values - inputs to that prior layer. This fraction is the Drop Ratel; we’ve set it to 0.5. This node also has configuration settings for noise shape, and a random seed, since the ‘dropped’ inputs are selected randomly during each training batch.
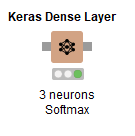
Another dense layer node, this time we only use 3 neurons and the Softmax activation function because these neurons will represent the probabilities of the different classes of cancer cells we’re training to identify.
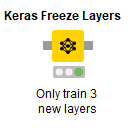
Finally, we arrive at the newest Keras node, the Freeze Layers node. With this node we’ll freeze every layer except those that we’ve just added to the end of the VGG16 model above. That’s how we’ll retain all the intelligence of the old model while still repurposing it for our new task! Nothing fancy in the configuration here, just choose which layers to train and which not to train.
This has been a summary of just a few of the customization options in the KNIME Deep Learning Keras Integration; there are many more nodes and possibilities to explore so dive in there!
If you want to read more on predicting cancer cell types and learn all about the pre-processing involved and where to find the data don’t forget to go and revisit the original blog post, 'Using the new KNIME Deep Learning Keras Integration to Predict Cancer Type from Histopathology Slide Images' here.
Resources
- Read Images and Train VGG workflow group:
- Description and Data File ~ 2GB of dataset
- Meng, Tao, et al. 2010, 'Histology image classification using supervised classification and multimodal fusion', 2010 IEEE International Symposium on Multimedia
- Deploying deep learning to assist the digital pathologist presentation
- VGG16
- KNIME Image Processing Extension
- KNIME Deep Learning
- MNIST Keras Workflow
- Deep Learning workflows on KNIME Hub
- The KNIME Deep Learning Keras Integration extension
Requirements
- KNIME Analytics Platform v4.x
- KNIME Rest Client Extension
- KNIME Image Processing Extension
- KNIME Python Integration, KNIME Image Processing – Python Extension
- KNIME Deep Learning – Keras Integration. Find the setup instructions here
Note that you won’t be prompted to install the KNIME Image Processing - Python Extensions when opening the workflows: you have to install manually.
Note that you won’t be prompted to install the KNIME Image Processing - Python Extensions when opening the workflows: you have to install manually.
- You can either drag the extension from the KNIME Hub to the workbench of KNIME Analytics Platform 4.x
- Or from within KNIME, go to File → Install KNIME Extensions, and select KNIME Image Processing - Python Extensions
The extension is used by the ‘DL Python Network Learner’ to read the ImgPlus cell type from KNIME Image Processing into a format that Keras and Python can use.