
We asked KNIME users to share their tips and tricks on using KNIME
Ever sat next to a friend or colleague at the computer and were awed when you suddenly realised the way they do certain tasks is much better? In this series of posts we’ll be showing you how the experts use KNIME in the hopes that by sharing ideas you’ll discover some handy techniques.
Viewing Content in the Workflow Editor
You can visualize two workflows (or metanode content) side by side inside the Workflow Editor of KNIME Analytics Platform.
To return the view to show only one editor, drag the additional editor tab to the tab panel in the main editor. Drop when you see a gray line appearing in the tab panel in the main editor.
Fast Insertion of Nodes in a Workflow
If you pick a node from the Node Repository and drag it over an existing node in the workflow, you will see small white and blue boxes appearing inside the existing node. If you then drop the repository node, it will replace the existing node.
If you double click the node in the Node Repository it automatically appears in the your Workflow Editor, already connected to the previously selected node (if any).
When dragging a node from the Node Repository to the connection between two nodes in the workflow, the node is automatically inserted between and connected to the two nodes.
The Apply Nodes
Perhaps you need to transform your data in some way - for example, you might need to perform a binning function, deal with missing values, or normalize features prior to training an algorithm. Sometimes though you might need to reuse a previously defined transformation. For example, if your data are already split into a training and a test set, the data transformation is usually defined on the training set and then reused for the test set or another independent dataset.
That’s where a particular type of node – the Apply nodes – come in. Apply nodes usually take two inputs – a method or model for applying a transformation, as well as the input data to be transformed.
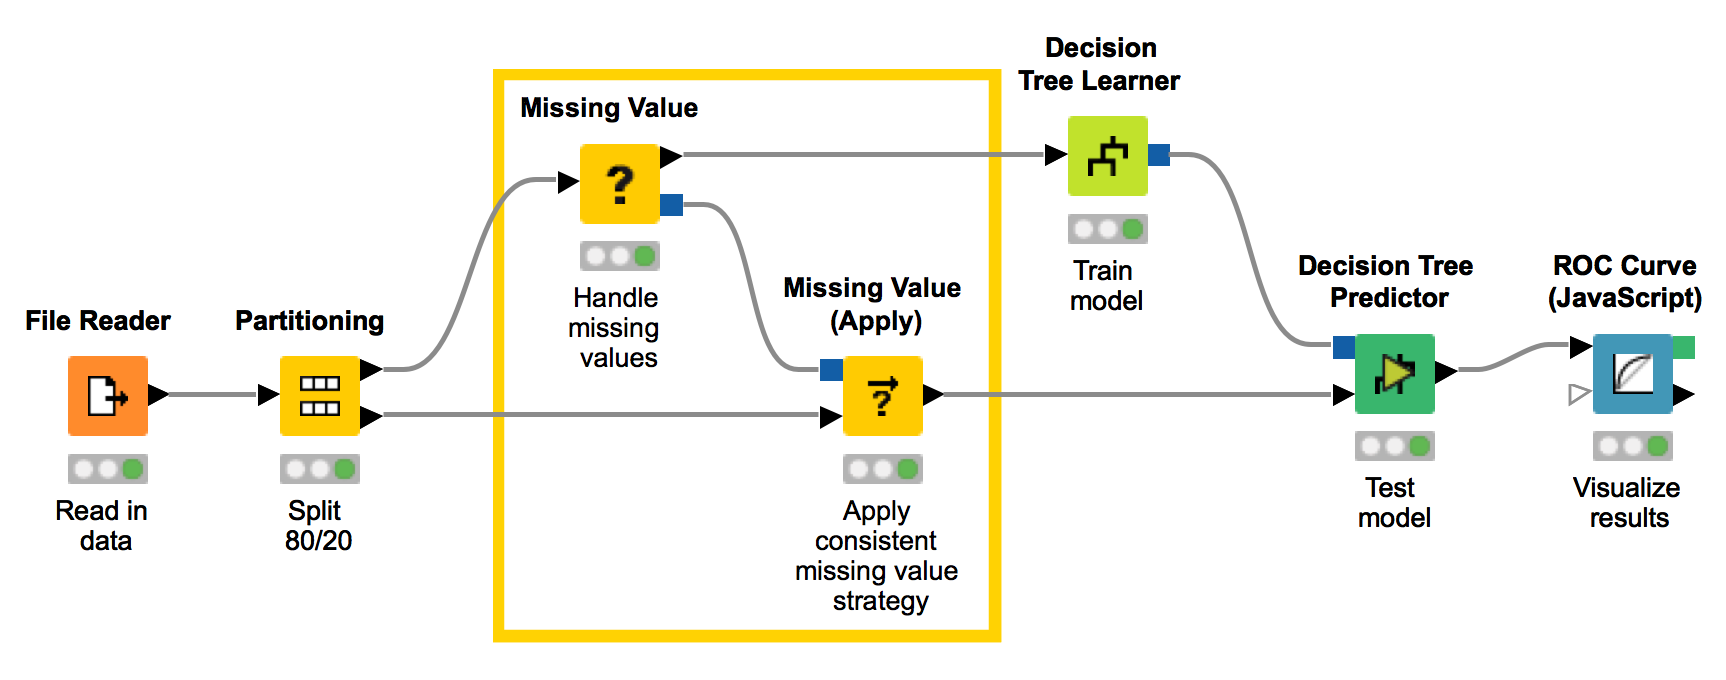
The figure below shows a simple workflow that reads in data, partitions the data, builds a decision tree model, and produces an ROC curve. The highlighted nodes in the middle feature impute missing values, by defining the rule on the training set and applying the same missing value imputation with a Missing Value (Apply) node on the test partition. In this way, we can be confident that the same imputation strategy selected for the training dataset is being used also for the test set.
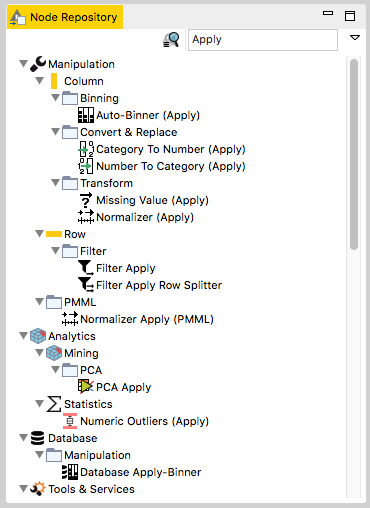
As for the Missing Value (Apply) node, many similar Apply nodes exist, all applying previously defined transformations to the input data (see figure below).
PMML Node Tips
What about if you’d like to save a model for execution later on a different dataset or different machine? Or maybe you need to share the model with a colleague who will deploy it in a different context?
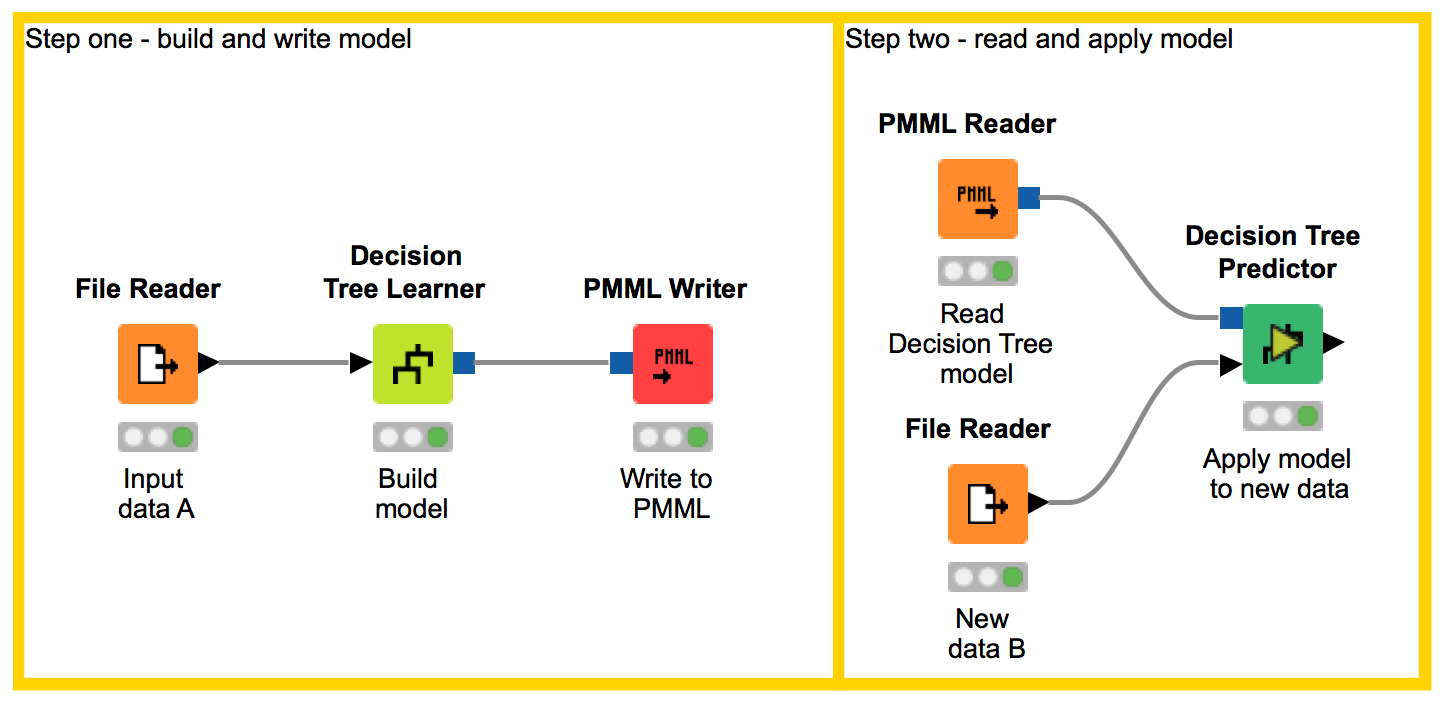
An easy way to do that is by saving the model in PMML (Predictive Model Markup Language) format using the PMML Writer and PMML Reader nodes. The figure below uses two workflows. One workflow builds a decision tree model on dataset A, and writes that model to a PMML structured file. The other workflowreads in the PMML model, and applies it to an entirely new dataset, B.
The advantage of using the PMML structure, to store and retrieve the model, lies in its standard character. Indeed, a PMML model can be used in KNIME Analytics Platform,as well as Python, R, Java, or any other script that includes PMML libraries.
Keyboard Shortcuts
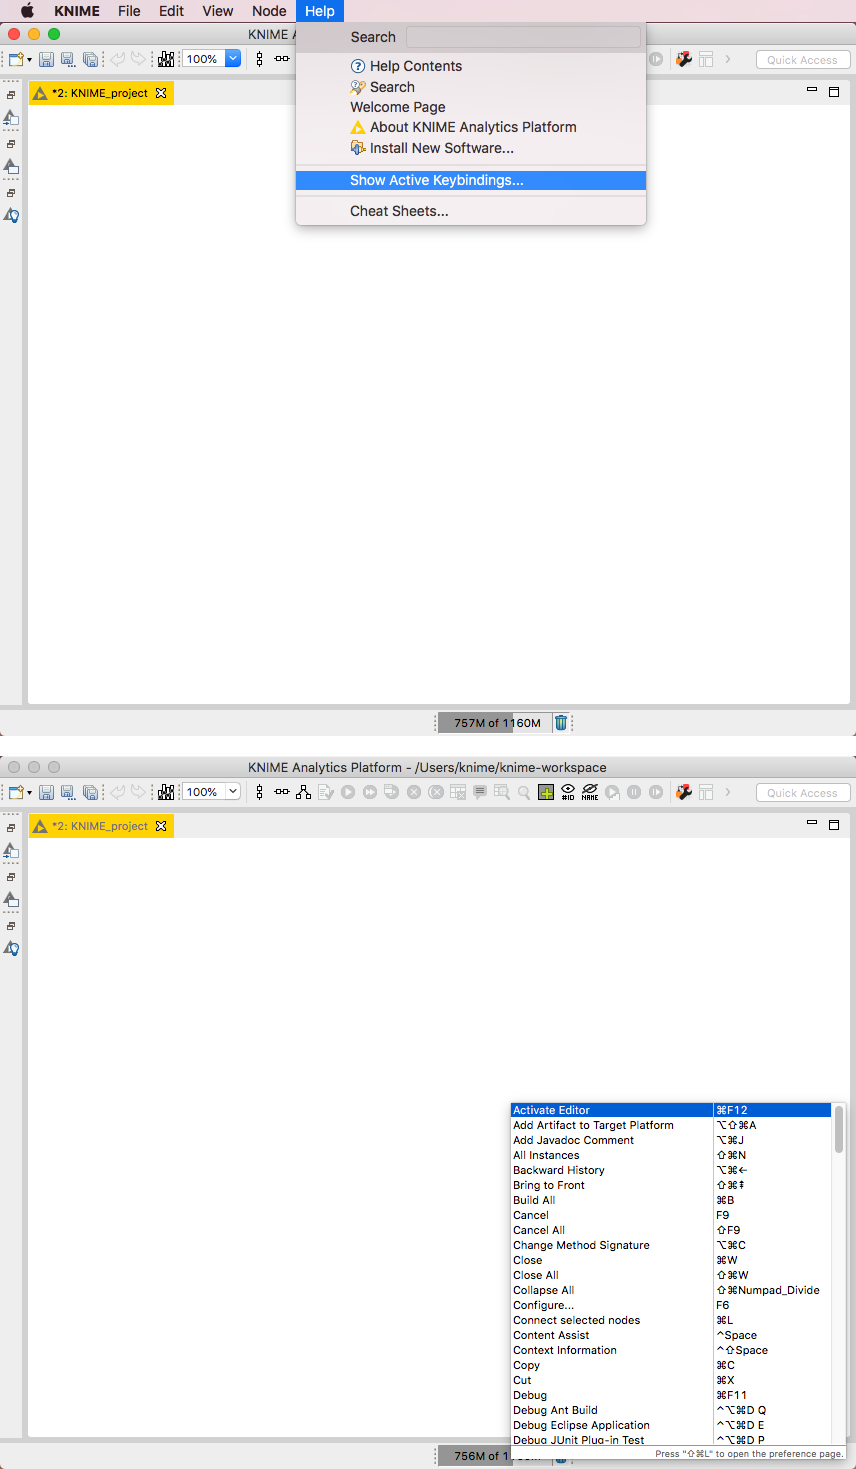
The keyboard shortcuts for menu commands are listed, as you would expect, with the menu item. To view a full list of keyboard shortcuts, choose Help > Show Active Keybindings. From here you can view all the key bindings to commands, modify the bindings, and create your own shortcuts.
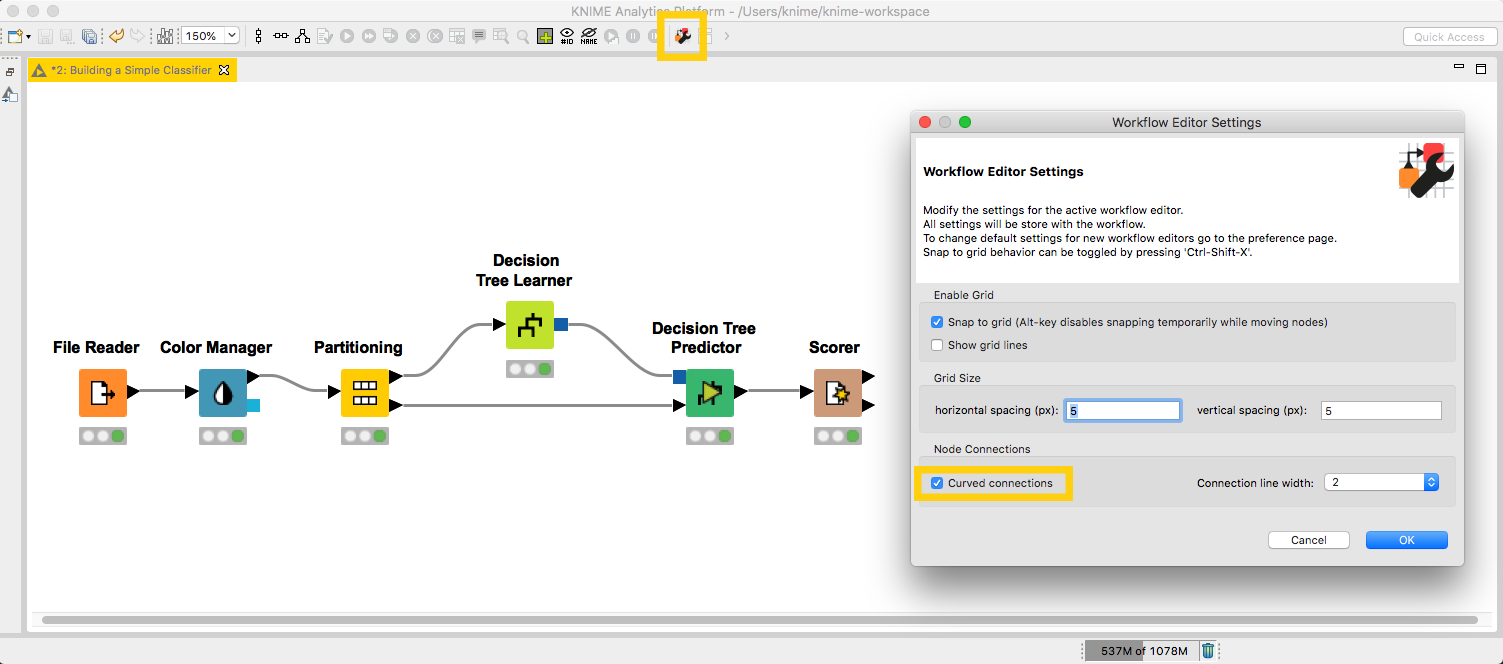
Change the Default Workflow Editor Settings
Go to File > Preferences > KNIME > KNIME GUI > Workflow Editor. In this dialog, you can change the default node label if you prefer newly created nodes to have other labels than Node 1, Node 2, etc. You can also change the grid size, or remove the grid in the background completely. And, if you have switched to curved connections for every workflow separately until now, setting curved connections to a default connector type may be a good idea.
Remember that you can change the new default settings for single workflows any time in the Workflow Editor Settings.
Magic with the Ctrl button...
Pressing Ctrl you can change the OK button in the configuration window to an “OK+Execute”.
Thank you...
...to the KNIME experts who have provided us with their tips and tricks.
We would love to post more useful tips and tricks to use in KNIME Analytics Platform. Send your ideas to blog@knime.com. Selected tips and tricks will be published in this blog, together with their author!