
What are the tricky issues around date & time data in your projects? Here we look at five typical operations involving date & time and highlight five of our favorite features of the date & time integration in KNIME Analytics Platform.
Five typical date&time operations
- Convert from one date and time column type to another
- Calculate Date&Time differences
- Extract time windows
- Generate fixed time intervals
- Use flow variables for date&time configurations
Five date&time highlights

1. Convert from one date and time column type to another
In older versions of KNIME Analytics Platform, there was only a single column type that could be used for either date only, time only, or date and time. Now there are dedicated column types for each of these uses. And in addition to these three column types, a column type for date and time with a time zone.
Here are the four new column types for representing date and time:
- Date e.g. 2016-11-28
- Time e.g. 19:50:53
- Date&Time e.g. 2016-11-28T19:50:53
- Date&time with zone e.g. 2016-11-28T19:50:55+01:00[Europe/Berlin]
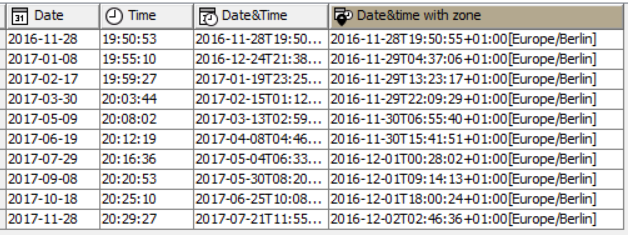
Highlight #1. Time Zone Support. This is especially useful for all dealings with databases.
Use the Modify nodes to convert one date & time column type to another
There are three nodes you can use to convert from one date and time format to another, or to change date, time, or time zone. These are:
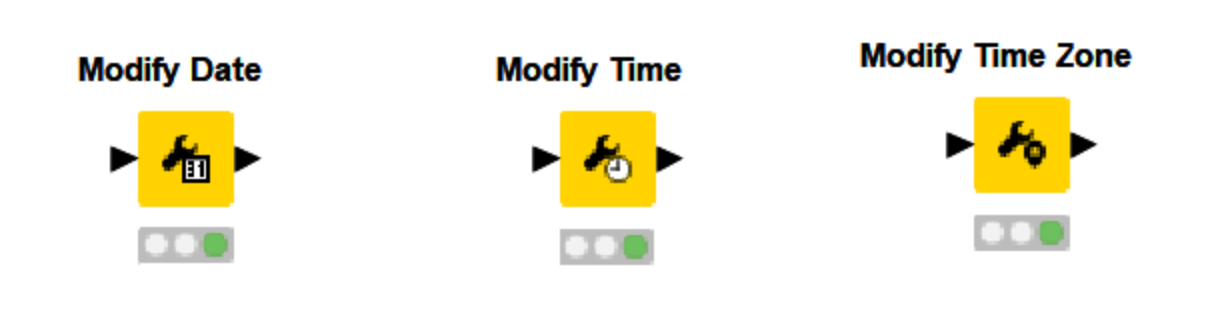
For example, you can convert a Zoned Date Time into a Date & Time by removing the time zone with the Modify Time Zone node. Or you can remove the time from a Date & Time with the Modify Date node. All three nodes can be used to add, modify, or delete options.
Note. If you are using so-called legacy Date&Time nodes there is no need to replace them in your old workflows.
If you want to convert from a legacy Date&Time format to a new format, you can do so with the Legacy Date&Time to Date&Time node. To convert in the other direction, you can use the Date&Time to legacy Date&Time node.
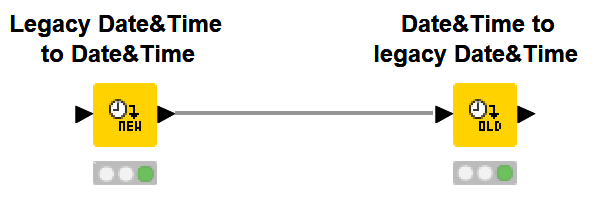
The Legacy Date&Time to Date&Time node will auto-guess the best matching date format based on the first selected cell. In the old Date and Time integration the time zone was always UTC. When converting from legacy Date&Time to new Date&Time, you can now specify the time zone.
Highlight #2. We have reached our second highlight: auto-guessing. Everyone who has ever had to read date and time strings knows the problem of figuring out what the correct format is. To make this easier, we now have auto-guessing implemented in the String to Date&Time node.
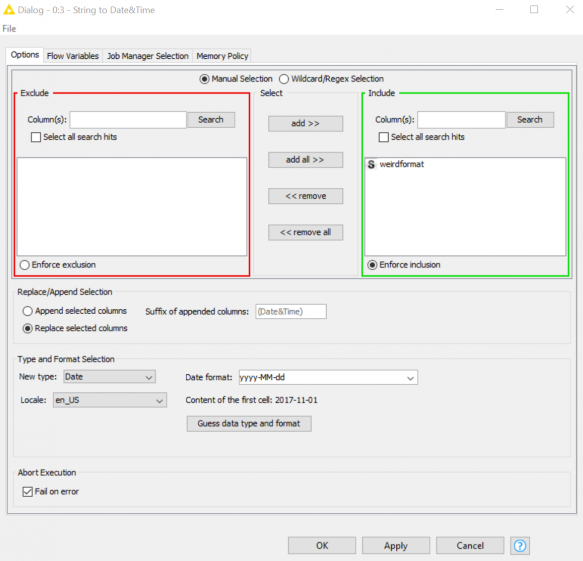
Highlight #3. In the dialog of the String to Date&Time node above you can see our next highlight: multiple column support. All Date&Time nodes support multiple columns. Since most of the time you have only one timestamp per row, this usually doesn’t matter, but there are times when this feature saves you a node or two.
2. Calculate Date&Time differences
The Date&Time Difference node calculates the differences between two date&time columns, between a column and the execution time, or between two consecutive rows. In addition, you can change how those differences are represented. You can:
- Choose a granular representation in terms of hours, days, weeks, or months by clicking on the “Granularity” option
- Calculate duration in terms of hours and minutes
The default visualization of the date cell duration is “Short Duration”, but you can change it to “Long Duration” in the “Available Renderers” configuration/context menu.
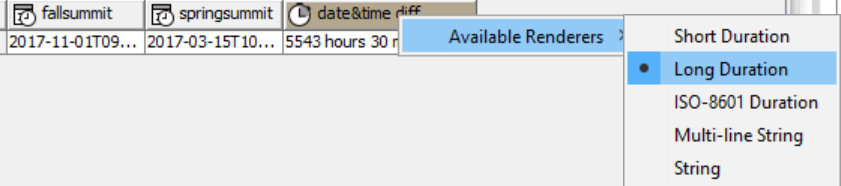
Highlights #4. Here is our 4th highlight: higher flexibility in measuring time differences. You can also measure the differences with durations.
3. Extract time windows
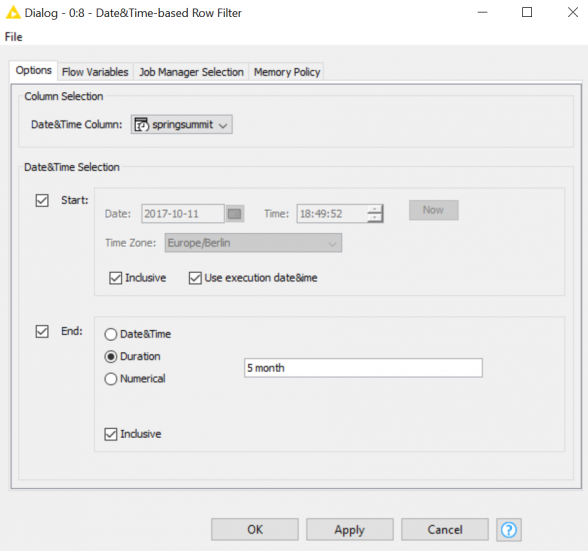
Durations are also very handy when you want to filter date and time cells. Suppose you want to have the last 5 months in your data. We have a node for filtering dates and times: the Date&Time-based Row Filter node. It can be configured with:
- A fixed start and end date
- The start date can also be set to the execution datetime
A duration from a start date with a period of 5 months and current execution time as start date will automatically return the last 5 months of data. In Figure 7 you see how you need to configure the node for this task.
4. Generate fixed time intervals
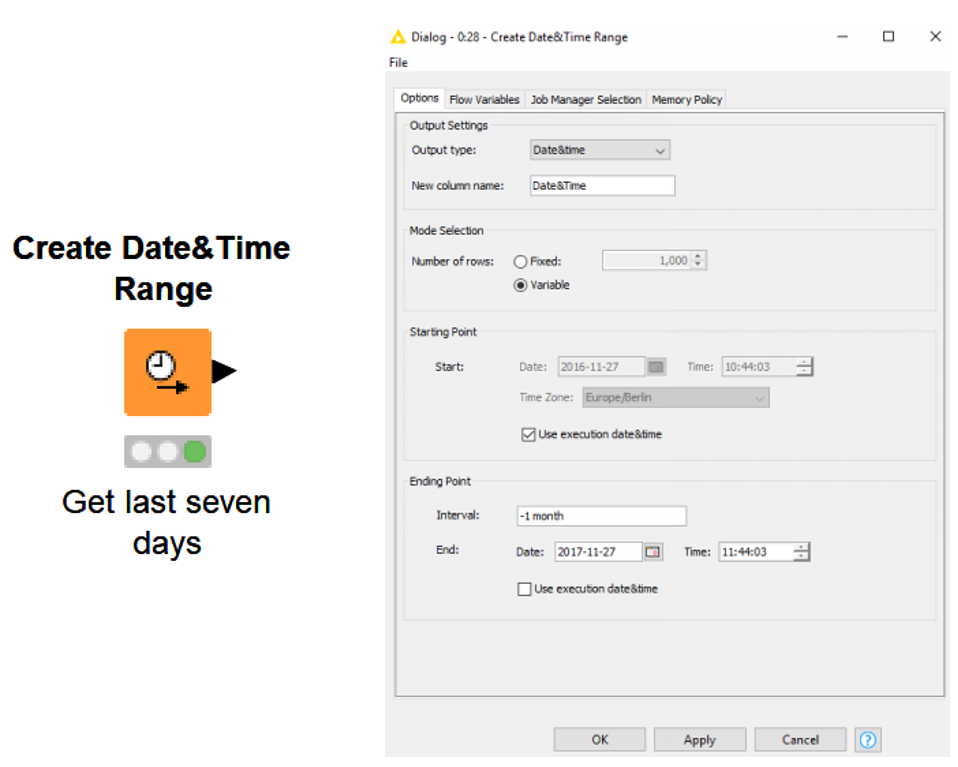
An often-requested feature is the generation of fixed time intervals. Here durations are useful as well. The Create Date&Time Range is the node for generating all kinds of date and time cells.
5. Use flow variables for date&time configurations
There is one of my highlights left, and some might claim I saved it for last in order to make you read the whole post.
Highlights #5. Yes, it is true: you can use flow variables for date and time configurations in KNIME.
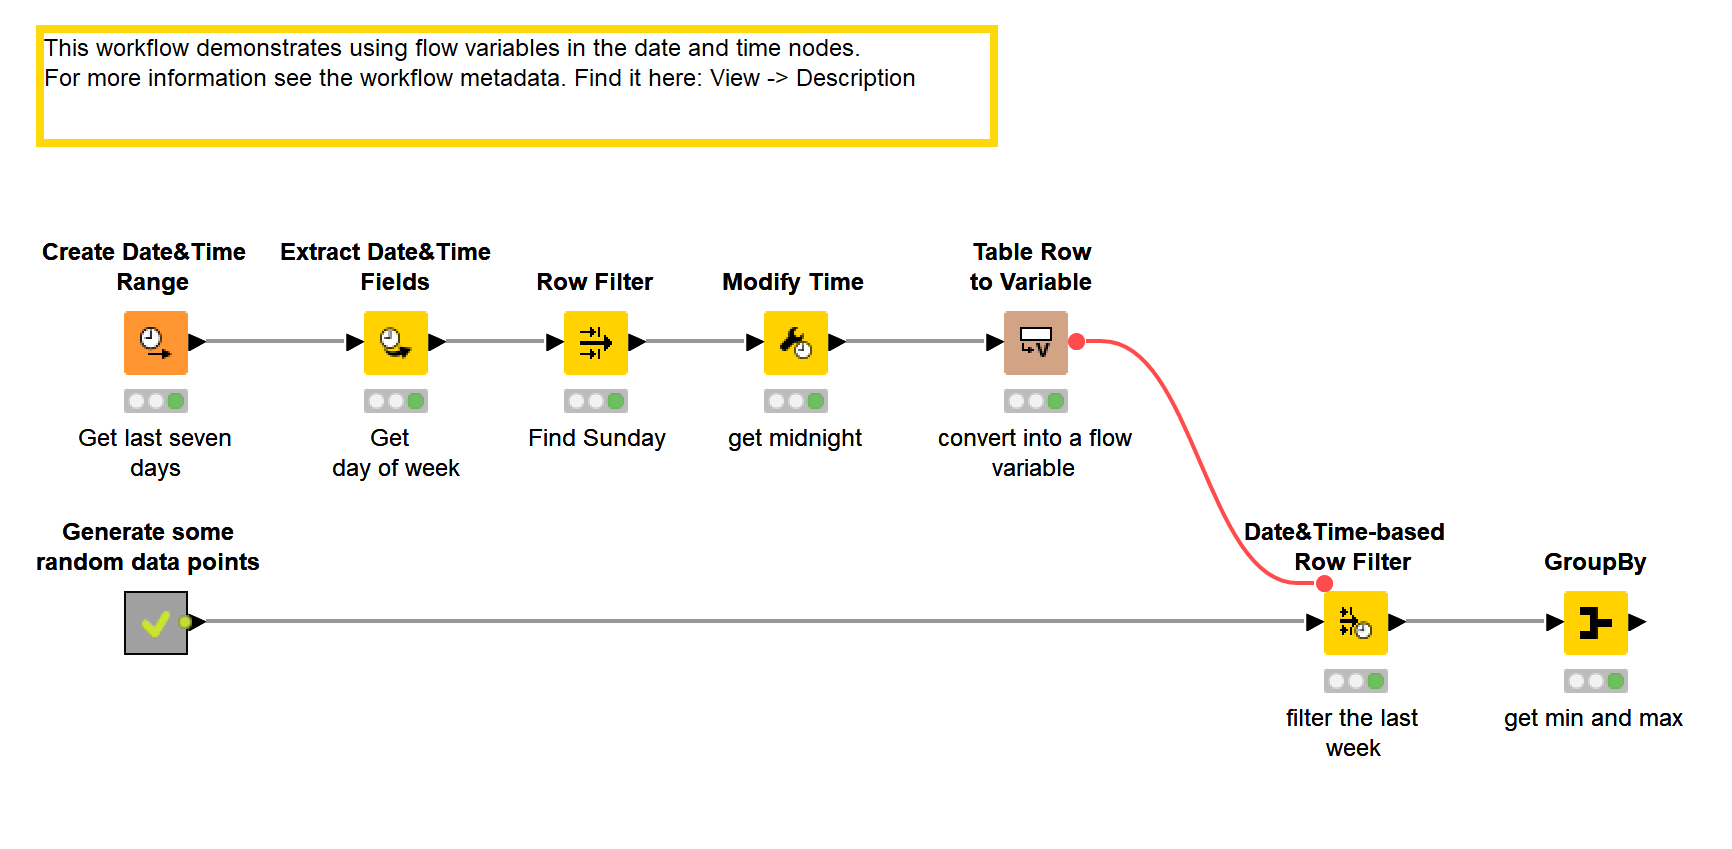
We'd like to illustrate this with a small use case of our own. We needed to filter the last full week of data from a dataset. To do this, we had to know the date of the last Sunday before execution of my workflow. We used the Create Date&Time Range node to generate the last 7 days before executing the node. Next, we extracted the “day of the week” with the Extract Date&Time Fields node, selected Sunday with the Row Filter node, and added the time to the date cell with the Modify Time node.
Finally, we could convert the date into a flow variable. The flow variable was used in the Date&Time-based Row Filter node. In addition, we also used the duration, to get every timestamp before last Sunday, but at most one week before last Sunday.
What are your date&time best practices or use cases?
These were our personal highlights using the date and time integration. What about yours? Email us your best practices or favorite use cases for date&time data to education@knime.com