Since the release of KNIME Server 4.7 operations with KNIME Server have been simplified thanks to the new feature of being able to manage client preferences. This feature allows KNIME Server administrators to define profiles for KNIME Analytics Platform users and makes it easy to enable KNIME Analytics Platform to support a wide range of technologies and databases across all major operating systems. Now with the most recent 4.8 release, further management services have been added in the form of customizations.
Read on to find out how to:
- Add customizations
- Define and manage profiles: server-side and client-side
Customizations
KNIME Server allows you to centrally define and manage customizations and profiles of all KNIME Analytics Platform installations across your organization.
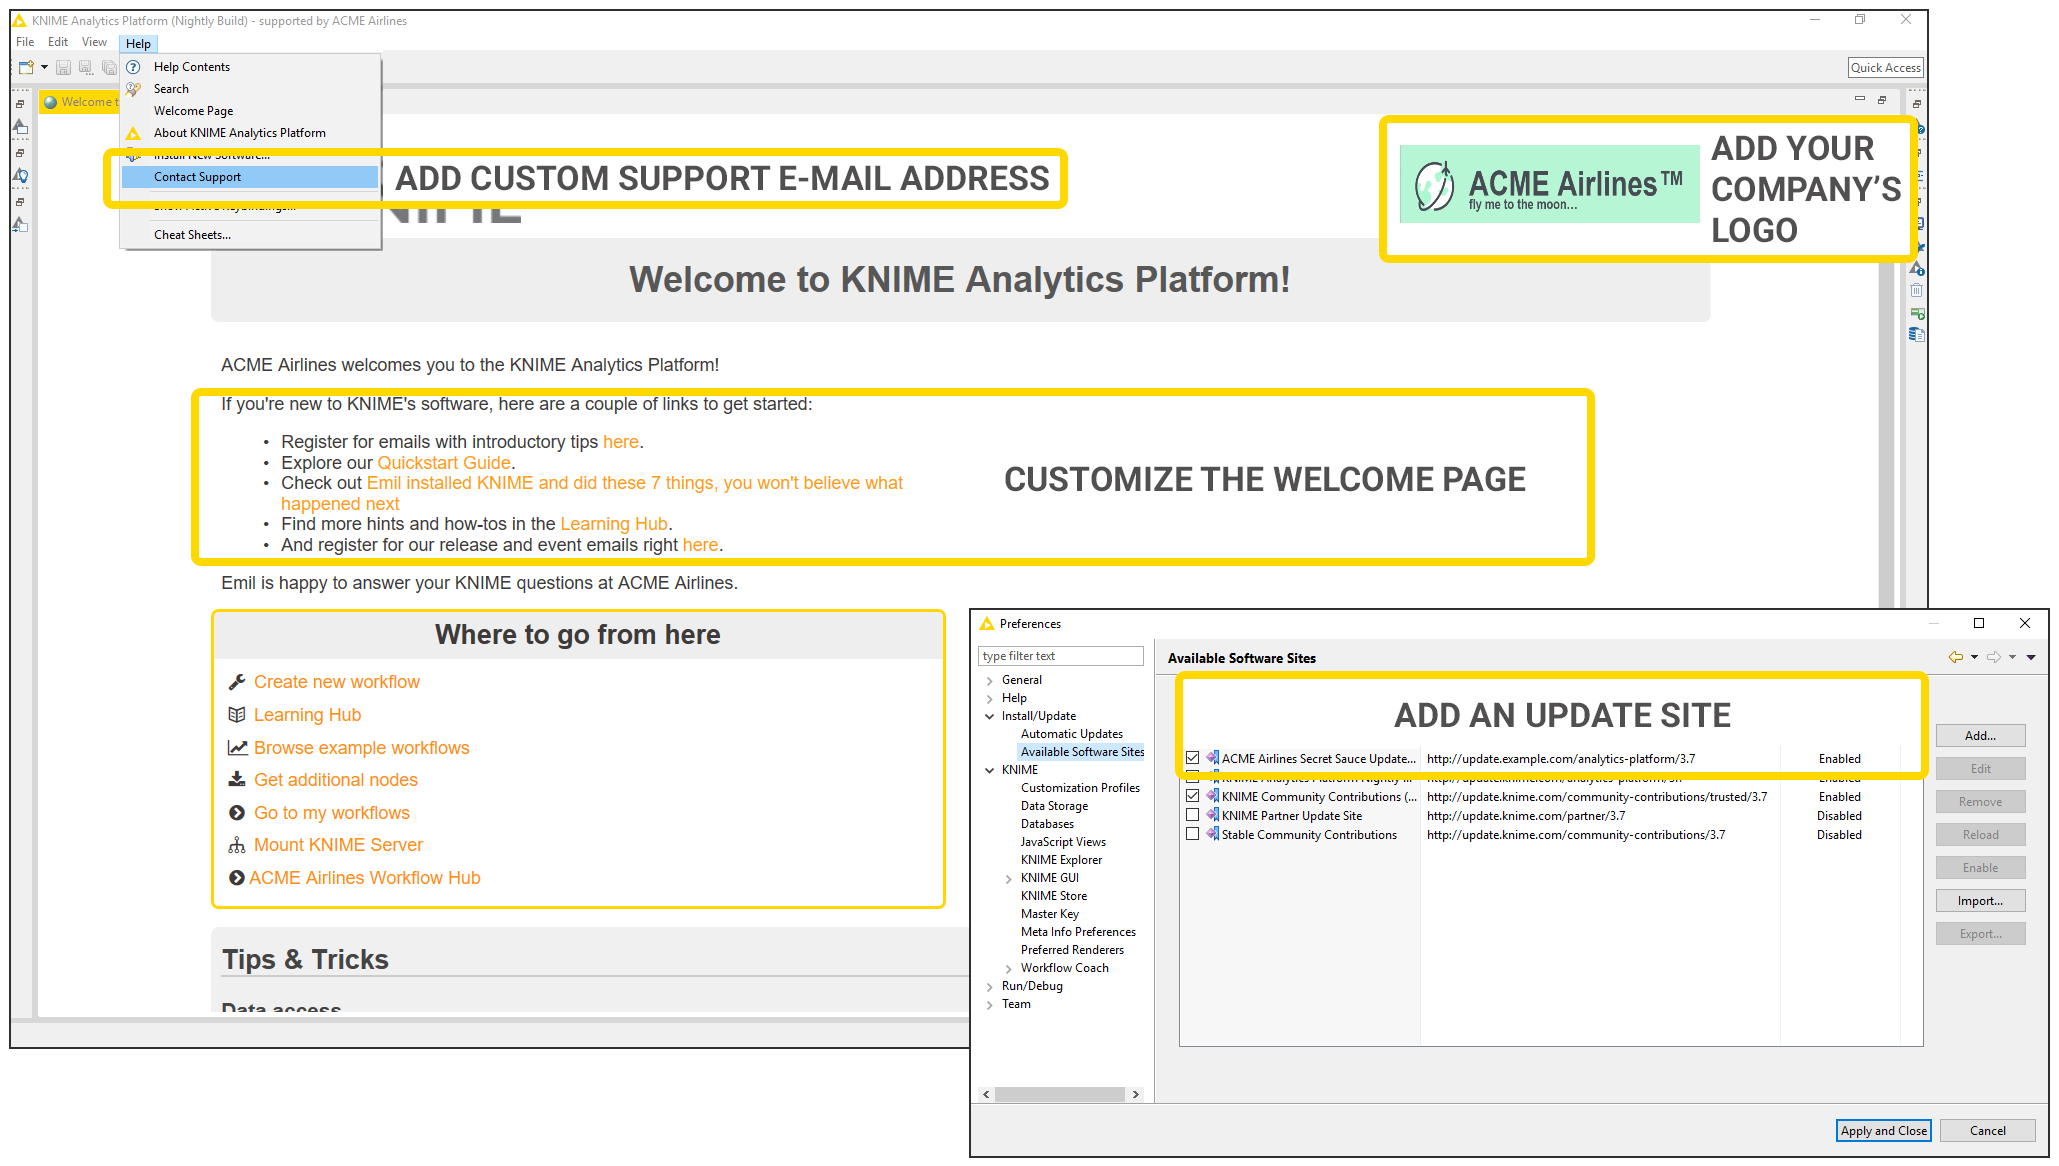
You can add your company logo and other team information to the starting page of KNIME Analytics Platform and provide your team with all the useful links they might need, including project information or the availability of new tools.
You can also add update sites so that your people have your organization’s own extensions and integrations at their fingertips. See Fig. 1 below for examples.
Defining and Managing Profiles
In the modern business environment, companies have to support a heterogeneous combination of operating systems and technologies, which I refer here to as “use cases”. (See Fig. 2) Defining profiles for each of these use cases simplifies deployment, speeds up rolling out changes, and generally makes it easier to onboard new users.
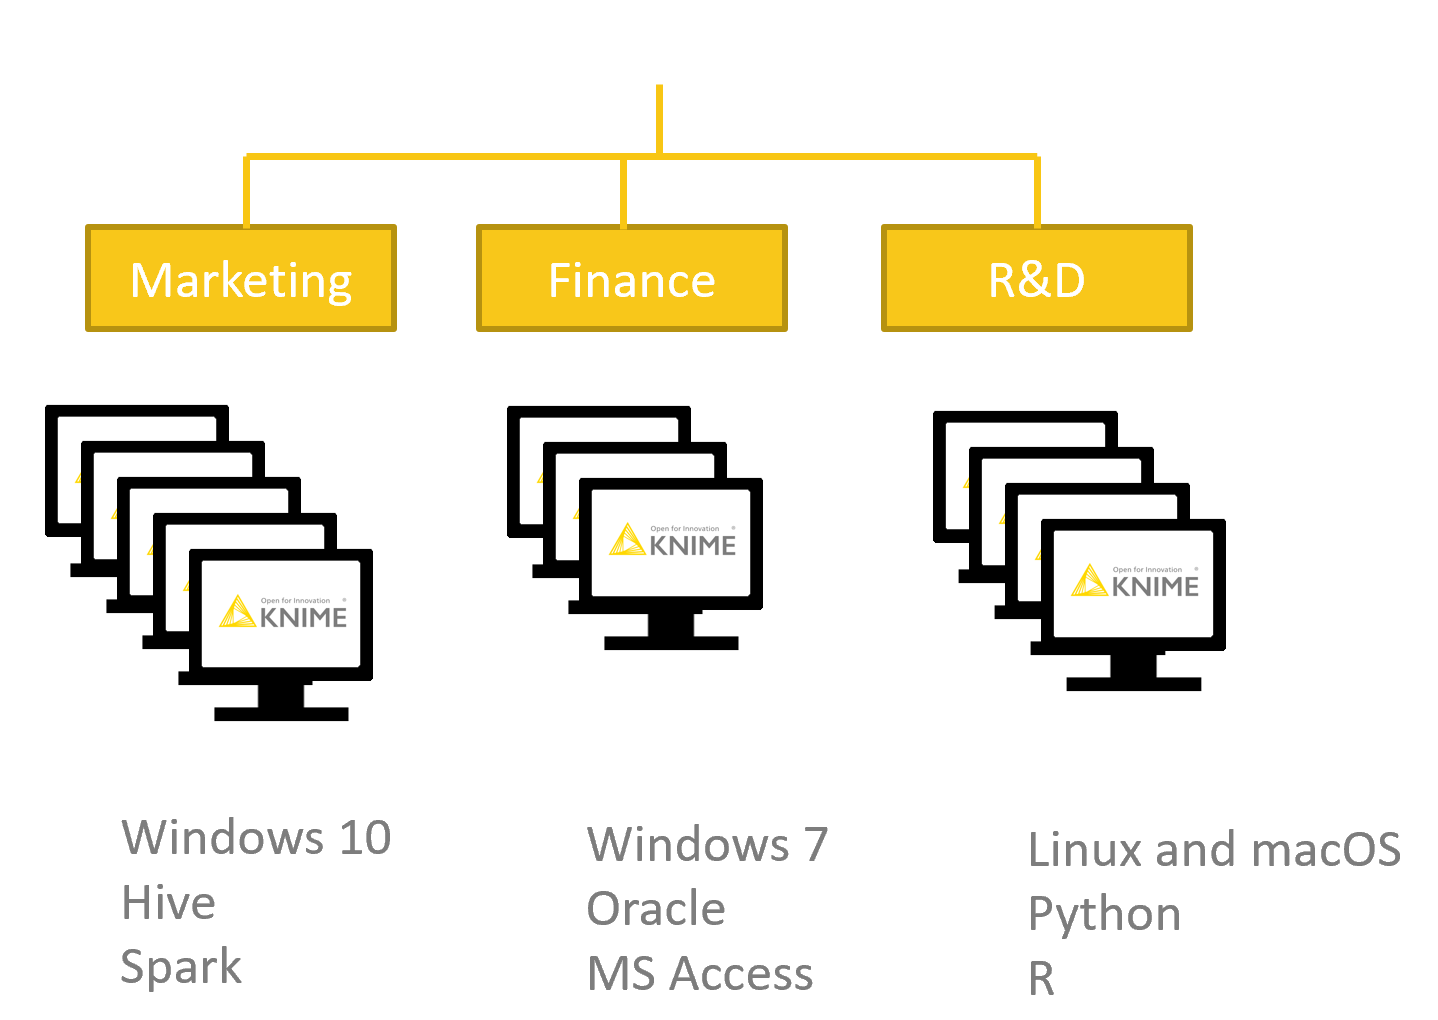
The profiles are flexible, and allow you to set up connections to databases, point to Python installations, define server mount points and set a host of other useful preferences. That’s great for server admins, as it reduces their support workload, and it’s great for users because they can get started without getting held up with setting up preferences.
Using KNIME Server to Manage Preference Profiles
KNIME Server can manage the preference profiles of KNIME Analytics Platform clients meaning that you will have fewer basic questions about configuring connections to databases, for example, or setting up Python.
Setting up KNIME Server to Manage Preferences
We’ve already been using this feature at KNIME to help our new data scientists get productive from the first installation of KNIME Analytics Platform. I now want to walk through how I set that up.
The Environment
KNIME employees use Windows, Mac and Linux all of which are KNIME Analytics Platform users (naturally!). Sometimes those environments can be set up the same way, e.g. the MariaDB database driver is a Jar file that works on any OS. But sometimes these environments need slightly different parameters for setting up e.g. Python (Batch file for Windows, Shell script for Linux/Mac). With Client Preferences we’ve built a flexible way to handle this, read on for more details.
Server-side Configuration
Client Preferences are all configured in this directory:
Examples from this article can be found in:
Preference snippets in each directory are assembled to create the final used profile for each client.
At KNIME I chose to set up the profiles on the basis of tasks but you may choose that it’s more appropriate to create profiles for different functional units within your organisation. That may be the case when the marketing department is using very different tools to the R&D department, or when departments or teams are using different Python library versions, for example.
Default Profile
In the default.epf profile snippet I did the following:
- Added the path to the MariaDB JDBC driver, which is located in the same profile directory. Note also the use of the
${profile:location}parameter which is automatically replaced on the Analytics Platform client with the path to which the driver file is downloaded (Fig. 5).

- Increased the database timeout, which is often handy when working with the Big Data Connectors (Fig. 4).
- Configured a KNIME Server Mount Point which all profile users will then be able to see in their KNIME Explorer (Fig. 5). Note also that I used the magic
${sysprop:user.name}parameter so that the username is automatically added correctly to the mount point at login time

- Finally I set up a configuration for KNIME Server to provide Workflow Coach recommendations to all Analytics Platform clients.
This means that KNIME Server scans the workflow repository and generates the workflow coach recommendation specifically based on the workflow usage in your organisation, as compared to the more general recommendations provided by the KNIME community.
Windows Profile
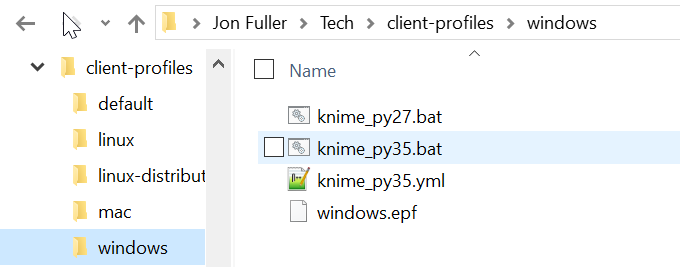
Here, I set up Python 3 as the default python, and also provide two batch scripts to configure Python 2 and Python 3 environments using Anaconda Python. See the webpage here for a more detailed explanation of the configuration. The great thing here, is that rather than each user needing to go through all the steps of this installation, the configuration is just done once on the server, and handed out to each of the users.
Linux Profile
In the same way that we configured the Windows batch script to configure Python for Windows users, we can do exactly the same for our Linux users. However, this time they need a shell script rather than a batch script. Otherwise there is no difference to the setup.
Mac Profile
At the moment this is exactly the same as the Linux profile, since we’re only configuring Python. Therefore I just copied the two files into that directory.
Client-side Configuration
Different IT organizations have different ways to get KNIME Analytics Platform out to their users. Sometimes users just need to go to our website and download ther KNIME Analytics Platform installer, or self-extracting archive. Some departments take the zip (or tgz) as a starting point and make that available on a shared network drive. Others use configuration management tools to deploy the executable directly onto the user’s computer. It’s also possible to make your own KNIME Analytics Platform build. Whichever way you’ve chosen to get KNIME Analytics Platform to your users, you have an option to set up Client Preferences to work.
The Three Different Ways to Apply Preferences
Setting in knime.ini
Adding four lines (lines 3-6) to the knime.ini, which is found in the same directory as the KNIME Analytics Platform executable means that at each launch of KNIME Analytics Platform, KNIME Server will be queried for the specified preference profiles, and they’ll be applied. The knime.ini setup is very convenient for those departments already making a custom zip file or using a configuration management tool, since the ini file can be configured to point to the KNIME Server that is providing the Client Preferences and the changes will be automatically applied at each launch.

Manually set a single preference
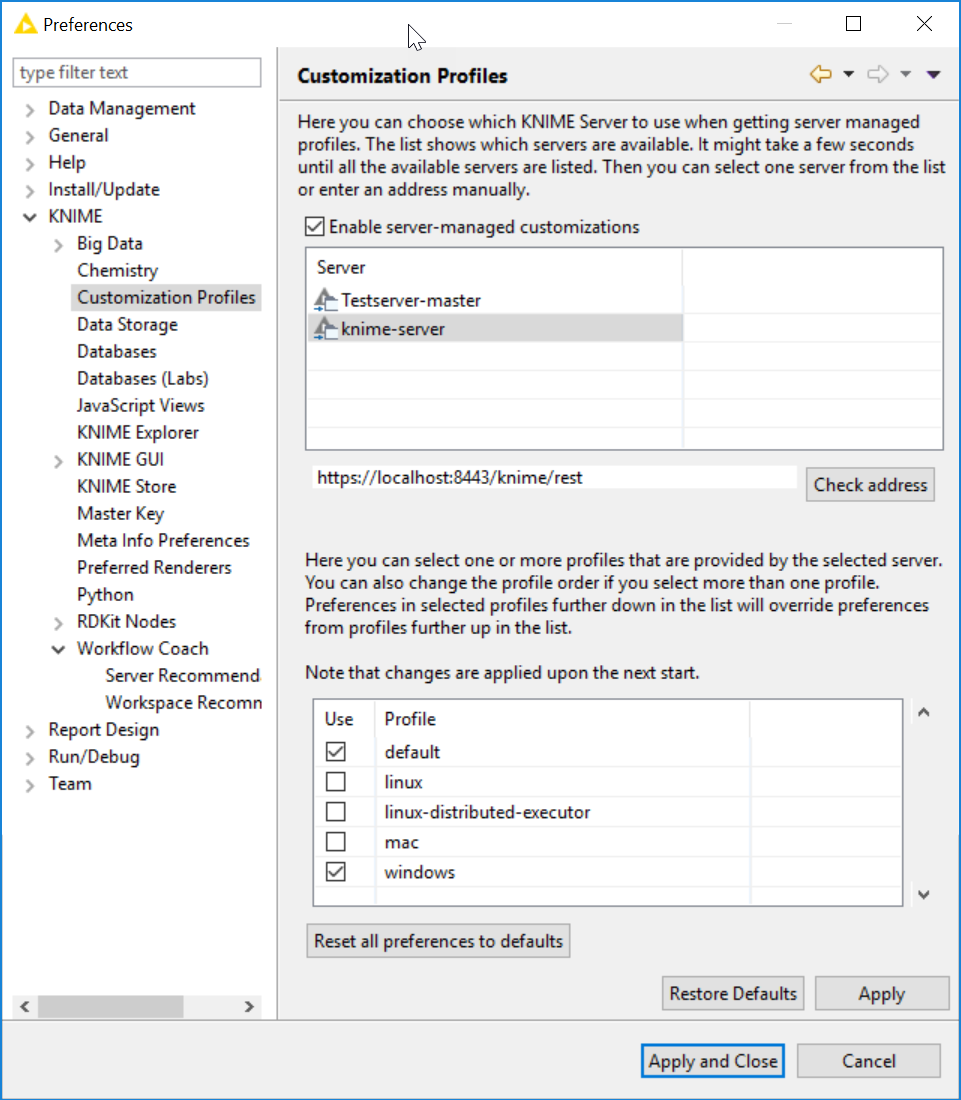
This allows users to browse available profiles and add them on demand. Typical use cases are when the knime.ini isn’t altered for all users, or when a user is using some profiles but wants to use more. That’s probably most appropriate for experienced KNIME Analytics Platform users, or organizations where each user downloads and installs KNIME Analytics Platform themselves. Of course, users could still choose to use the knime.ini method described above.
Write a custom extension point
99% of admins can skip straight to the next paragraph, but for the 1% that are interested you’ll need to check the documentation. Writing a custom extension point allows you to control a whole bunch of Eclipse preferences during launch time programmatically.
Summary
I have shown how to set up Client Preferences to simplify the setting of complex preferences for KNIME Analytics Platform users. I gave an example of how we’re doing that at KNIME. The slightly modified example files that accompany this blog post are included in the KNIME Server 4.7 default installation and can be modified according to your requirements.
Of course, not all people in an organization will need KNIME Analytics Platform to get stuck in with analytics. For those consumers of analytics we have Guided Analytics applications that can be deployed via the KNIME Server WebPortal.
