
Motivation
Most of the time, I use KNIME Analytics Platform to do exploratory work or build one-off workflows. Once I’ve finished one of these workflows, the real value it has - aside from being a good source of “spare parts” for future work - is that I can go back later and see what I did and how I did it. Some workflows are different though, and end up being used over and over again. When one of these workflows enters “production” and becomes an important part of my work, I like to always be able to be sure that it’s still doing what it’s supposed to do. This is particularly true when something in my environment changes, e.g. I install a new version of KNIME, or move to a new computer, or update some of the community or KNIME Labs nodes that end up liberally sprinkled throughout my workflows. I used to do this testing manually, but then I realized that KNIME itself provides the tools I need to automatically validate my workflows. This blog post is about doing exactly that.
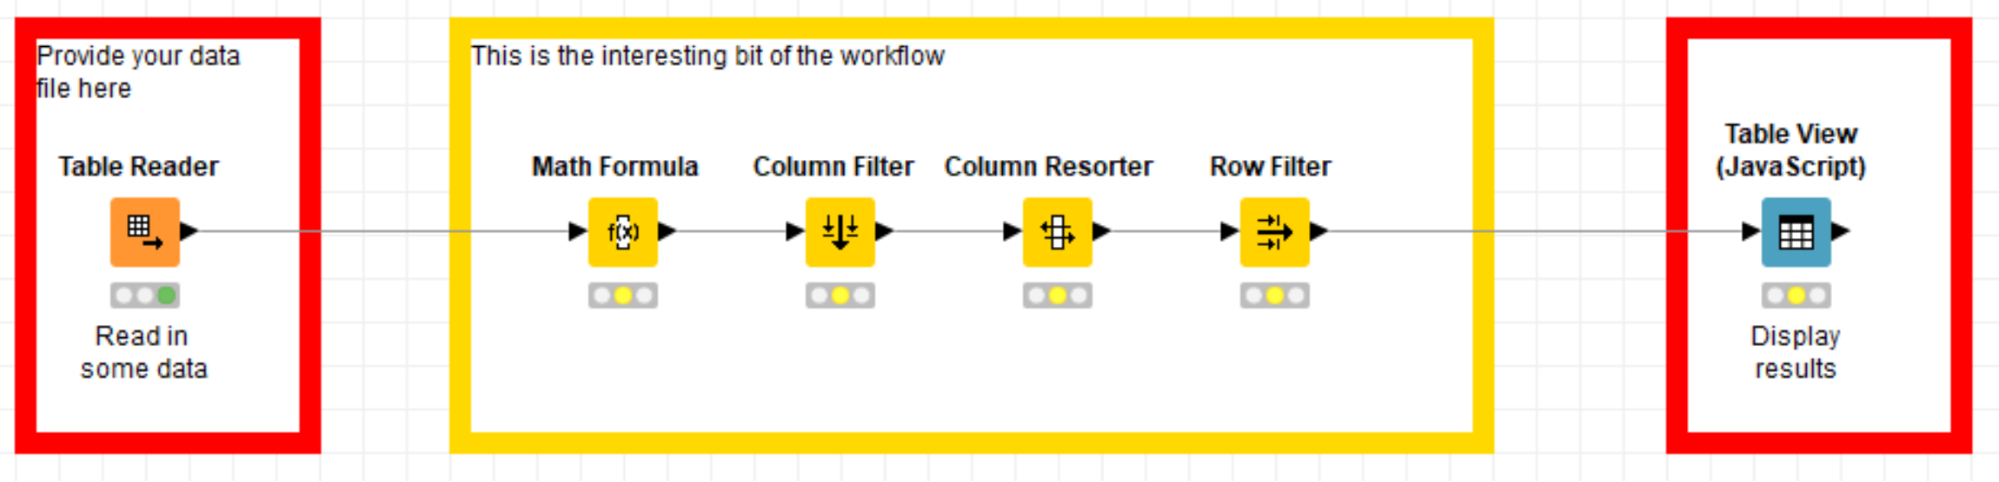
Because the post is about the method for making sure that a workflow is still doing what it’s supposed to do, and not about the workflow itself, I will use a toy workflow instead of something complex. Figure 1 shows my starting point.
Figure 1. The initial workflow we’re using for this blog post is just a toy example. It doesn’t actually do anything interesting (despite what the workflow annotation says!). The nodes in red boxes are the end user interaction points.
Let’s assume that the workflow above is the product of a bunch of work, is doing some serious data science, and that it’s important that I be able to validate that it’s doing what it’s supposed to do. An “old-school” way of doing this would be for me to keep around a standard set of input and corresponding expected output data and then do a test by loading the input data, executing the workflow, and manually comparing the output table with the expected output. This can be effective, but is boring and “somewhat” error prone (like any other boring manual task). It turns out that we can have KNIME do this tedious work for us and make the whole process repeatable and more reliable.
About the KNIME workflow testing nodes
The key piece to automating the validation of our workflow is provided by some infrastructure and a set of nodes that we’ve developed to test KNIME Analytics Platform itself: the KNIME Testing Framework.
You can install these the same as any other KNIME extension. Once installed you will have a new set of nodes available in the Node Repository, shown in Figure 2.
Figure 2: The new section of the Node Repository added by the KNIME Testing Framework. We will just be using the Table Difference Checker for this post.

There’s a lot there, but for this post we’re just going to use the Table Difference Checker. The rest of these nodes are documented in the doc subfolder of the directory plugin/org.knime.testing_* that is created in your KNIME install directory after you install the Testing Framework. Sorry that’s a bit ugly, these nodes were originally intended for use by developers, so the documentation is targeted at them; we’re working on that.
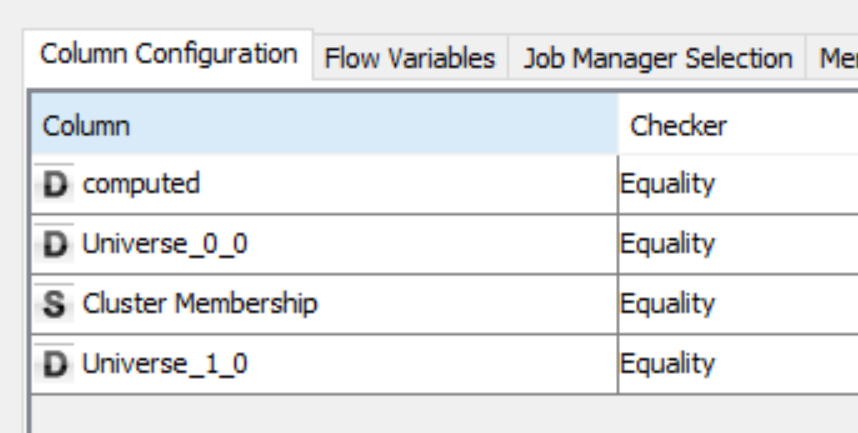
The job of the Table Difference Checker is quite simple: it compares the contents of two KNIME tables to each other and produces an error if they are not identical. So to test our workflow here we just need to read in our standard testing data with whatever the appropriate reader is (not shown here), feed that data through the workflow, and then use the Table Difference Checker to compare the generated results to a table containing the expected results (the so-called “golden table”), as shown in Figure 3. If the results generated do not match those in the golden table, the Table Difference Checker will generate an error when it’s executed.
Figure 3: Left: The last few nodes of our workflow with the Table Difference Checker added. Right: part of the configuration dialog for the Table Difference Checker showing the selection of how each column in the tables is compared.

Making our workflow testable
What we’ve done so far allows us to test our workflow, but has the disadvantage that when we want to test we have to go in and manually edit the workflow to select our reference data, add the difference checker, etc. In the next step we’re going to fix that: we will make a few tweaks to the workflow to allow it to be automatically tested without either editing it first or requiring that we save the workflow with a bunch of test data loaded as in Figure 4.
Figure 4: The testable version of our sample workflow. The wrapped metanodes in the boxes with blue borders were added to allow automated testing. The nodes in the boxes with red borders indicate the end user interaction points.

The two wrapped metanodes encapsulate some, unfortunately unavoidable, complexity. Fortunately, users don’t need to look inside these nodes in order to use the workflow: they can just pay attention to the two sections with the red outline. In the first of these they provide the data that they want to process, and in the second they can look at the results.
We don’t have the space here to explain the contents of the two wrapped metanodes in detail, but each of them does have one node where the workflow designer needs to provide input, these are shown in Figures 5 and 6.
Figure 5: The “Choose Dataset” wrapped metanode. The workflow designer needs to select the file with reference input data (to be used for testing) in the node in the blue box. This data is ignored if the user has provided a data file at the beginning of the workflow.

Figure 6: The “Run tests if necessary” wrapped metanode. The workflow designer needs to select the file with the golden table in the node in the blue box. This data is ignored and the tests are skipped if the user has provided a data file at the beginning of the workflow.

In Figure 6 you can see that the golden table provided by the workflow constructor is being passed to our new friend the Table Difference Checker node. This, of course, handles the actual testing that we’ll be doing.
Now that we’ve built the workflow shown in Figure 4, we can validate that it’s still doing what it is supposed to be doing by opening it in KNIME Analytics Platform and executing the “Run tests if necessary” wrapped metanode, without making any changes to the configuration of the Table Reader. This will read the reference input data, execute the interesting part of the workflow, and use the Table Difference Checker node to compare the results generated with the data from the golden table. If everything is working as it should, the “Run tests if necessary” node will switch to the green “executed” state. If there are problems, the “Run tests if necessary” node will report an error and we can look at the error message to see which values were incorrect.
Automating it
So far so good. We can now test our production workflow to validate that it still does what it’s supposed to be doing. It would be even cooler if we could skip the step where we needed to open the workflow in KNIME Analytics Platform to test it though. It turns out that the KNIME Testing Framework makes this easy: we just find the workflow we want to test in the KNIME Explorer, right click on it, and select “Run as workflow test” from the context menu that pops up. This will run the workflow test automatically and display a handy little report, see Figure 7.
Figure 7: Using “Run as workflow test”. Left: a piece of the context menu that appears when right clicking on a workflow in the KNIME Explorer. Right: the report generated when the tests for our workflow have been run. If any pieces of the workflow had failed, the green bar on top of the report would be red and there would be additional information available in the pane at the bottom.


If we have multiple production workflows that need to be tested, which is certainly something that often occurs, we can test them all at once by putting them in a single workflow group in the KNIME Explorer, right clicking on that, and selecting “Run as workflow tests”, as in Figure 8.
Figure 8: Using “Run as workflow test” on multiple workflows. Left: The view of our workflow group in the KNIME Explorer. Right: the report generated when the tests for all four workflows have been run. If any pieces of any of the workflows had failed, the green bar up top of the report would be red and there would be additional information available in the pane at the bottom.


Wrapping up
In this post I’ve shown you how KNIME Analytics Platform makes it easy to set a workflow up so that you can test that it’s still doing what it’s supposed to do. I did this using the KNIME Testing Framework and by configuring the workflow so that it executes using standard input data and uses the Table Difference Checker node to compare the results generated with standard output data. In a future post we’ll show how you can use this foundation and the KNIME Server to starting doing continuous delivery and deployment of production workflows. In the meantime I hope this inspires you to start testing your own production workflows so that you can feel safe when you change computers or update software versions!