Since the introduction of AI in data science, we find ourselves dealing with more and more AI within our workflows. From prompting LLMs, possibly with the help of a RAG procedure, to developing AI agents, we can build a wide range of various AI-powered applications. Based on their AI content and on their level of autonomy, we can even establish an application hierarchy.
In this article we want to show how you can build agentic systems in KNIME by following a four-step process.
The agentic landscape
The article Agentic AI and KNIME explores the agentic landscape, by listing four types of building blocks: Tools, Intelligent Tools, AI workflows, and Agents. Here’s a recap:
- Tools perform specific tasks. If you are a KNIME user, any workflow you have developed so far could become a tool. Notice that a tool must be callable from other applications, as a web service or as a web application.
- Intelligent tools are like tools, but include some AI-based tasks, like summarization, translation, or text generation. They are AI-powered but not capable yet of much autonomy.
- AI workflows combine multiple tools in sequence to accomplish more complex tasks. Let’s suppose that our solution includes tasks A, B, C, and D. Tasks A, B, C, and D could be tools called by a manually implemented top application, like a KNIME workflow. This top application is an AI workflow. An AI workflow can, in turn, become a tool itself.
- AI agents go one step further and dynamically decide themselves which tools to use. While in AI workflows, the sequence of tools is manually assembled by an operator, in AI agents the tool orchestration is assembled by an AI-powered application, based on the tool descriptions. This places agents at the top of the hierarchy in the agentic landscape. Again, agents can become tools themselves to serve other agentic applications or services
Turning a KNIME workflow into a tool is easy. We have done it multiple times when we were deploying web services. But how hard is it to create a truly agentic system?
You would be surprised at how simple this is. KNIME lets you construct AI agents in a modular way thanks to its visual workflows. KNIME's visual workflows replace traditional code with a drag and drop interface. Each step in the process is represented by a so-called node, making it easier to track data flow, identify issues, and explain logic clearly.
Visual workflows also make it easier to assemble agentic applications and services. It can be summarized in four steps.
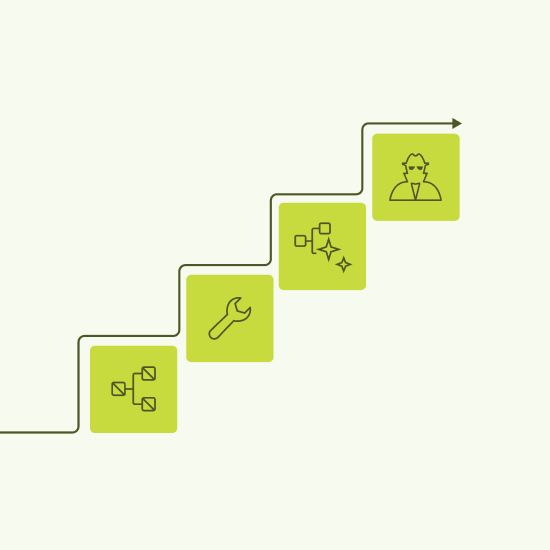
- Step 1. Define the task. This means: define the input data and the desired output. Possibly also define some intermediate steps, like a human in the loop approval framework, a file reading block, a sentiment extractor, a language detector, or some other step you deem necessary. If this is the first agent in your Agentic AI landscape, it might be worth it to build the KNIME workflow that solves the task. This gives you clarity of what is needed and creates the workflow segments from which to generate the tools, if needed.
- Step 2. Populate the tool repository. The Tool Repository is a folder containing a bunch of tools, hopefully also including the tools your agent needs. Notice that while some tools might already be available in the “Tools” folder, some required by the agent might be missing. Proceed with a quick inspection and build the tools required and still missing.
- Step 3. Build the AI agent framework, by organizing the tool orchestration with AI. Use this AI Agent framework to test the new tools by calling them one at a time.
- Step 4. Feed the AI agent with the complete task. Now it is the moment to feed the AI Agent with the real more complex task. This requires a more complex prompt and an exhaustive set of tools.
Shall we try it?
Note: You can find all the workflows and tools described in this article available to download in the 4 Steps to AI Agents space on KNIME Community Hub. Remember that AI keys are not provided with the workflow (you'll need to use your own AI keys).
Step 1. Define the task
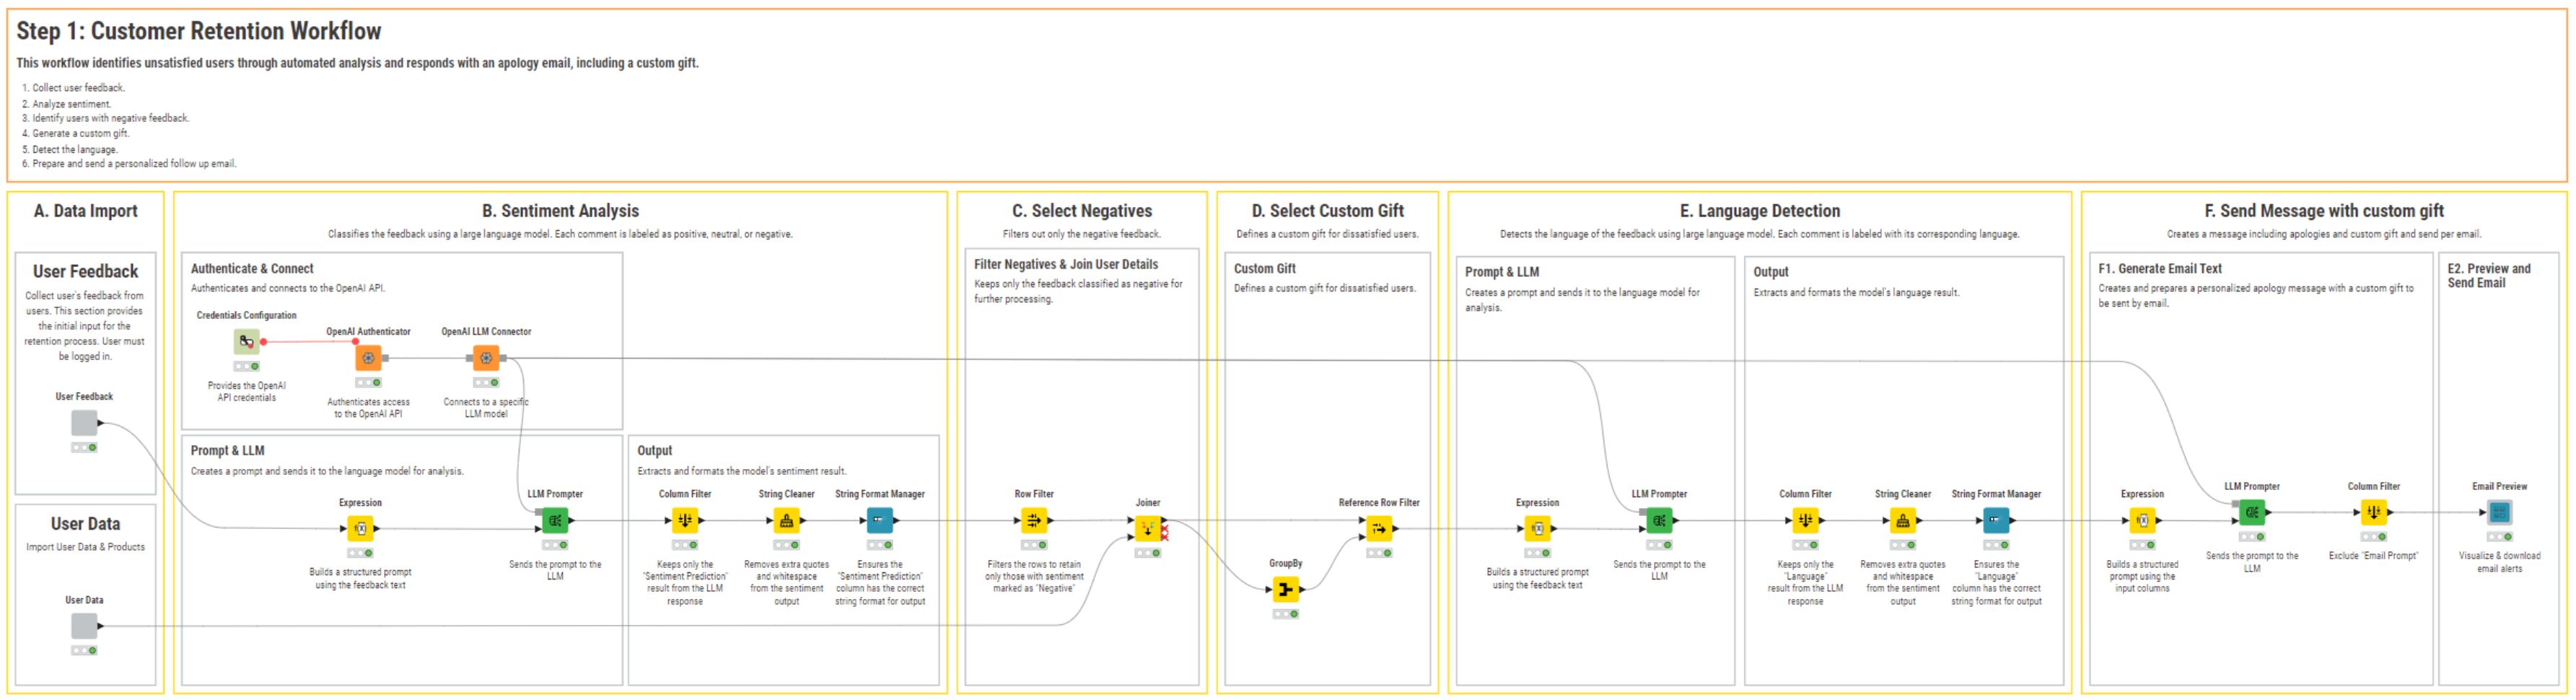
Let’s take a classic customer retention task: isolate unsatisfied customers for some follow up marketing actions. Specifically, we want to isolate all customers with negative reviews and send them a free gift to appease them. The solution could be modularized as follows.
Task A – Collect Data. Collect the customers’ data from the CRM system and the customers’ reviews from various social media channels. This is a classic ETL task. Read the data from different data sources, clean them and load them for further processing.
Task B – Extract Sentiment. Perform a sentiment analysis on the customers’ review texts. This is by now a simple task, if performed with the help of AI.
Task C – Isolate Unsatisfied Customers. Extract customers with negative sentiment. This could easily be performed with a Row Filter node. It could also be assimilated into task B with a more effective prompt.
Task D – Select a custom gift. From the results of a classic recommendation engine, here we select the most appropriate gift to send to each unsatisfied customer.
Task E – Detect Language. Before preparing the apology text, we must detect the language used by the customer for the feedback. Again, this is another task that has become nowadays easier to implement with the help of AI.
Task F – Send a gift package. Send the gift package together with a nice apology message. This could be split in two subtasks:
- Task F1: Generate the apology email text in the customer’s selected language, using AI
- Task F2: Preview and send the email together with the gift package. This is a human in the loop step, since it allows the human to check and approve the text before pressing “Send”.
Note. This is an overdefined list of tasks. AI Agents by now are able to generate this list of tasks internally, when implementing the required top task. However, for the sake of clarity, we listed here all of the tasks for a customer retention application. We can later compare with what the AI Agent implements and marvel at its complexity.
If we were to build the corresponding KNIME workflow, including segments for all above mentioned tasks, we would obtain the workflow shown in Fig. 1.
Tip. Take the time here to define logical blocks in your application. It will turn out to be useful when building the tools.
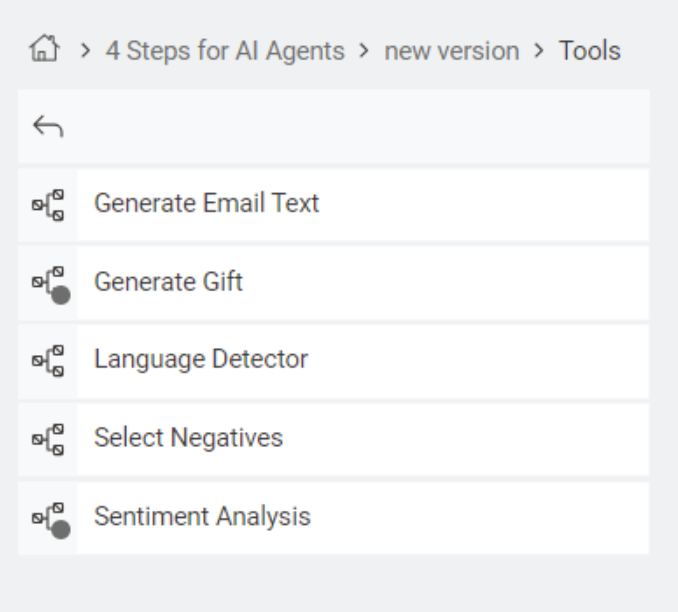
Step 2. Populate the tool repository
The Tool Repository is a folder containing a bunch of tools, including the tools your agent needs.
In our case, we used a folder located within the same folder as the agent workflow, readable with the following path “../Tools” relative to the current AI Agent workflow’s folder. However, if you are working in a larger company structure, it would be preferable to use a more centralized location, accessible by multiple members of the team, like for example a folder on a KNIME Hub.
If some tools are missing, you will need to build them. To build a tool, you just need to create or isolate workflow segments and transform them into tools. To transform a workflow segment into its own workflow, we can manually copy and paste the workflow segment into a new empty workflow canvas or we can use Integrated Deployment to avoid copy and paste mistakes.
To make a tool available to other services, we need to deploy the workflow segment into a service or a data app. To deploy a workflow on a Hub, just move it to the selected Hub.
First upload the workflow on the KNIME Hub. Here's how:
- Right-click the workflow in the “Space Explorer” tab on the left
- Select “Upload”
- Select Hub and connect with your credentials
- Select space and folder in Hub and press the “Choose” button
Next, you need to deploy it as a service.
- First, version the workflow,
- Then click the “Deploy” button and select “Service”.
The workflow is now saved as a web service, accessible via the REST protocol, on the selected location on the selected Hub account
To create a complete service, i.e. a service that can also accept input data and produce output data, all you need to do is substitute the input node of the workflow with a Workflow Input and append a Workflow Output node to the end of the tool, to import or export data respectively.
Tip: The Workflow Input node has a field “Description” in its configuration window. The text in this field provides a description of the expected input data that the tool will use. Make sure to add a meaningful description here, before deploying the tool.

Following this procedure, we built the services for a number of tasks in our application, including tasks with AI prompting, which - we will see later - are of no use.
If you are entering a pre-existing agentic system, it is possible that some tools will already be available in the tool repository. Obviously, for the principle of saving time and work, we will adapt our application to reuse available tools as much as possible.
Tip. If there is an agentic strategy in place at your company, sooner or later you will have a large repository of tools. In this case, it is highly likely that a similar tool has already been deployed. Always check first!
Step 3. Build the AI agent framework and test the tools
We have all the tools we need; the next step is to call them. At the moment we do not have a node that specifically calls services containing Workflow Input, Workflow Output or Configuration nodes. Such services - tools - are currently only callable from an Agent Prompter node.
The Agent Prompter node is the heart of any AI agent. This node:
- Connects to an LLM agent
- Imports the set of tools provided at the input port
- Reads the data on which to operate
- Imports previous conversations for context
- Sends user-defined prompts to the selected LLM
- Calls selected tools based on prompts
- Produces the conversation history and the output data at the output ports
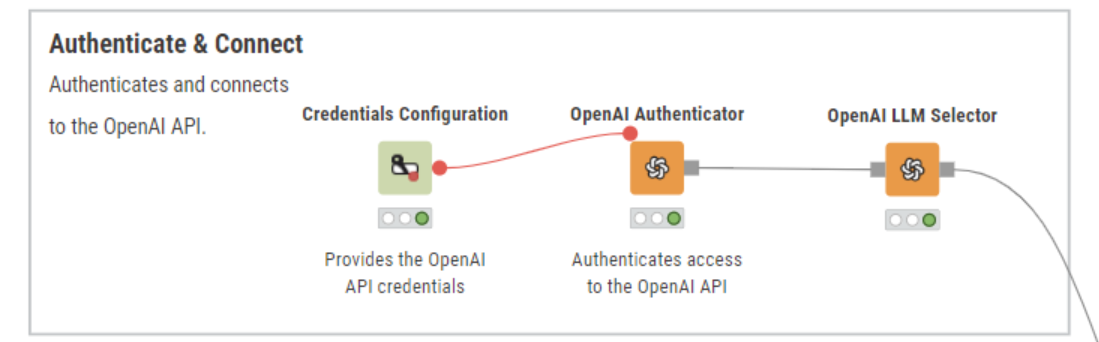
1. Connect to an LLM agent
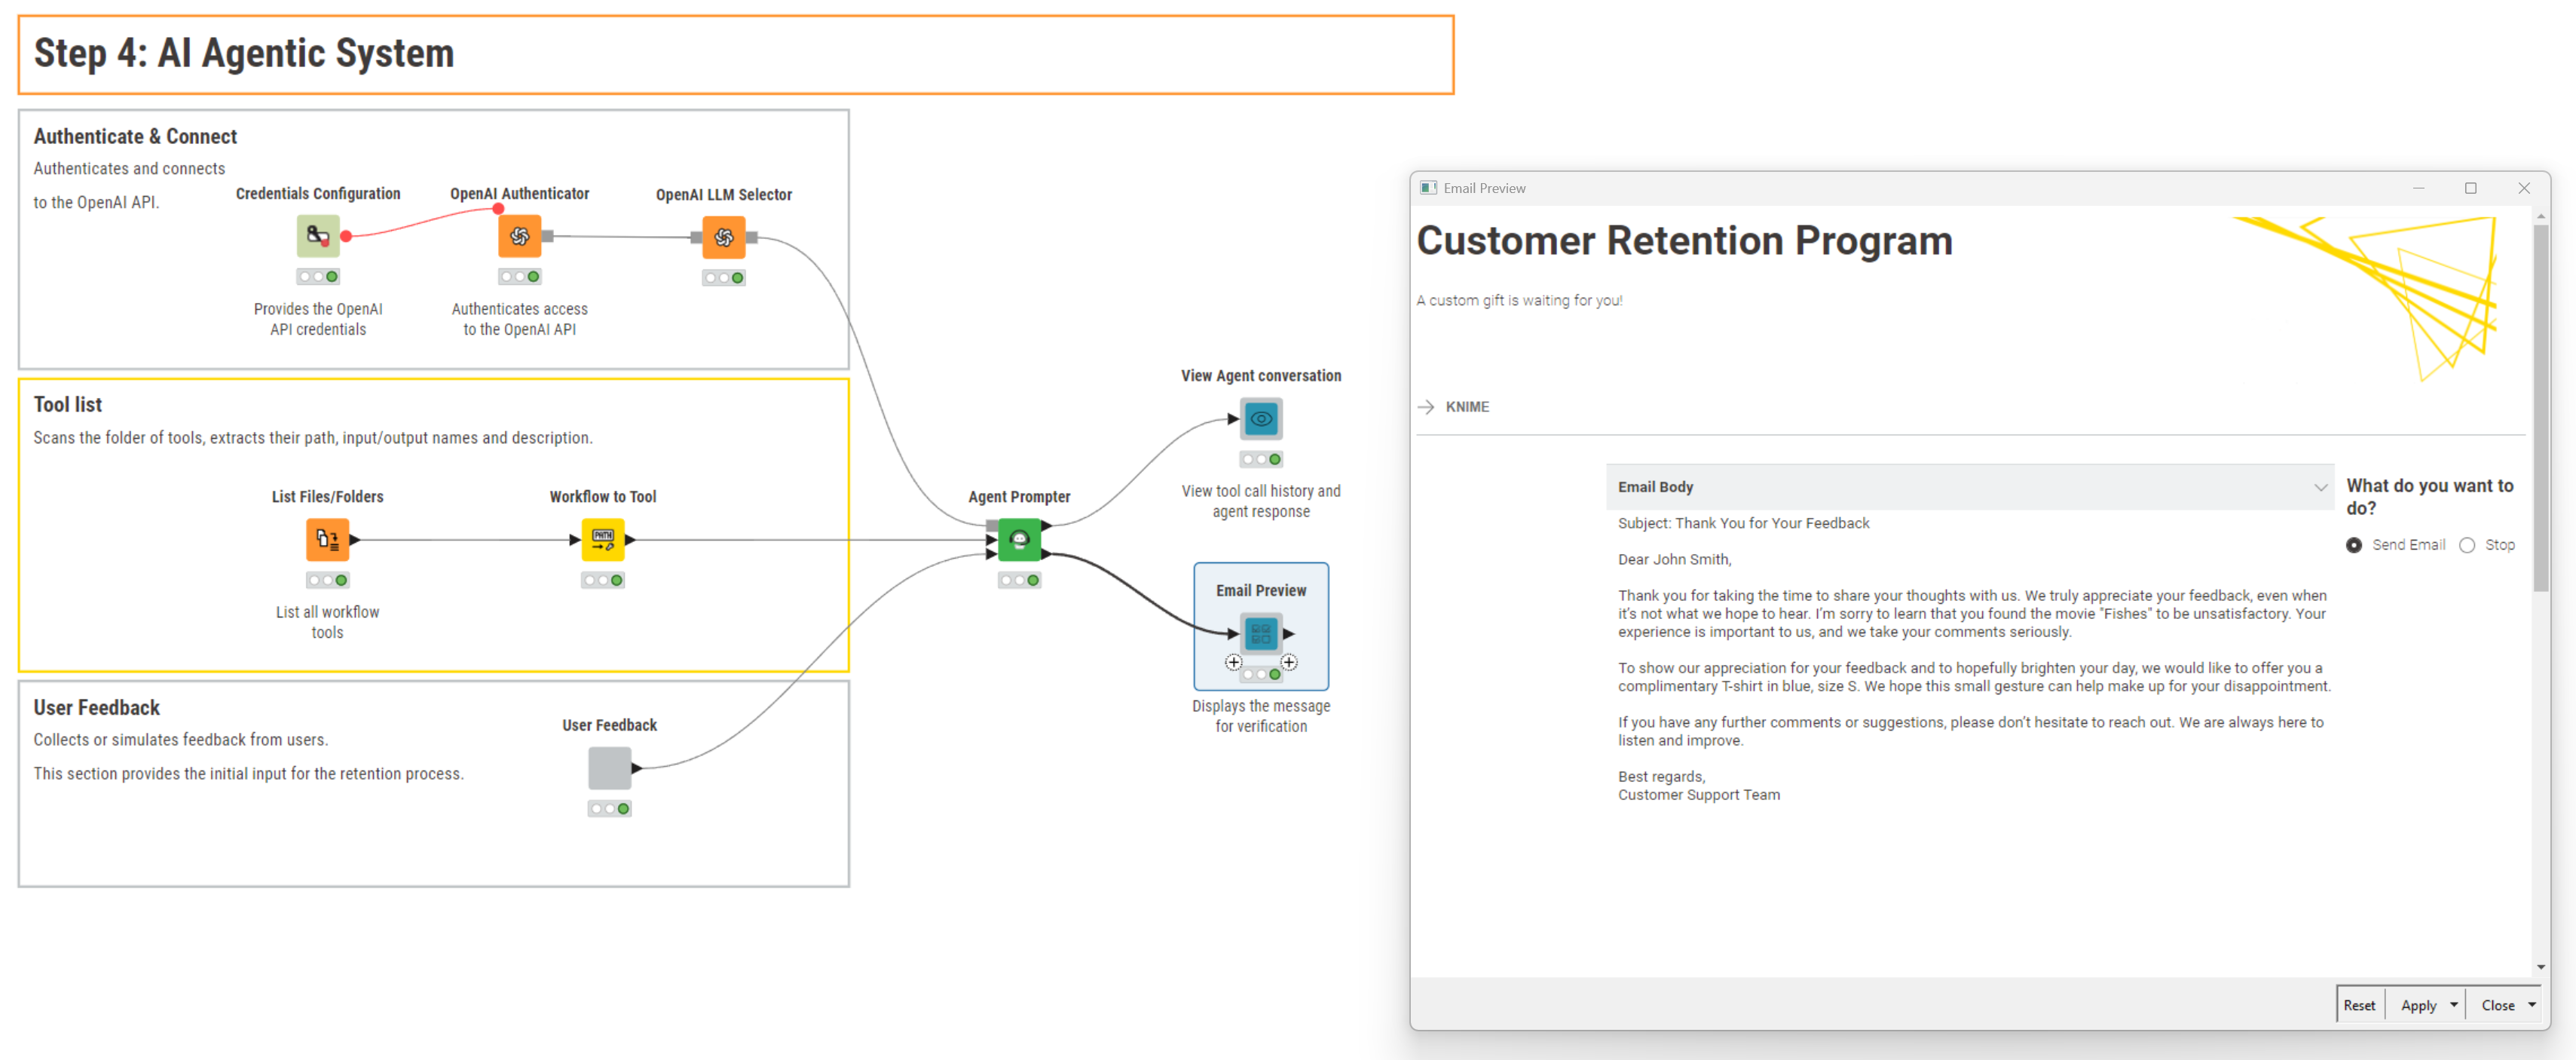
This connection comes through the first input port (light gray squared) and it is established using the sequence of nodes Credentials Configuration, Authenticator, and LLM Selector for the AI provider of choice.
2. Import set of tools
The second input port of the Agent Prompter node collects the tools. The Workflow to Tool node extracts the tool description, the number of parameters, and the number of input and output tables (and their descriptions) contained in the tools.
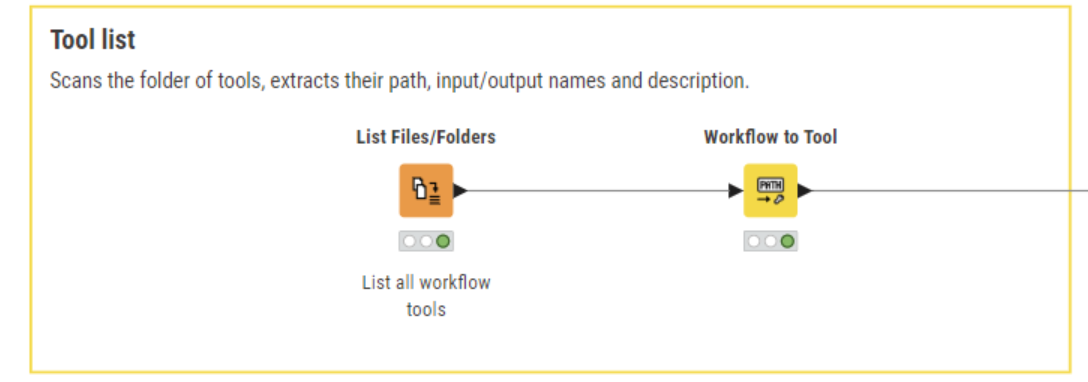
During the previous step, we have collected our tools in the “Tools” repository and all tools have been assigned an exhaustive description of the task they implement. Now we extract all tool descriptions, feed them into the LLM, and ask the LLM to call them in an appropriate sequence to perform a given task.
3. Read dataset
By default the node is created with the two ports above only, i.e. the necessary ports. However, it is possible to add ports for data tables and conversation ports in input and output. We added one input port for the review and user data. Input data are optional, since not all agents work on input data.
4. Import conversation table
Same for the conversation ports. If there are previous conversations that can help the LLM understand the context and make better decisions, they should be provided as input to the Agent Prompter node. Again, conversation history is optional, since not all agents require it or it is not always available.
5. Define prompts
Prompts are of course the most important part of shaping an AI Agent. The Agent Prompter node has two fields for prompts in its configuration window: the System Message and the User Message.
The System message provides some general rules for the Agent. We used the following prompt:
“If you are not sure about file content or codebase structure pertaining to the user's request, use your tools to read files and gather the relevant information: do NOT guess or make up an answer.”
The User message provides precise instructions about the task that the agent is supposed to implement. Remember that at step 3, we want to test whether our tools are working. Therefore, we provided the following prompt for the agent to call the “Generate Gift” tool.
For example:
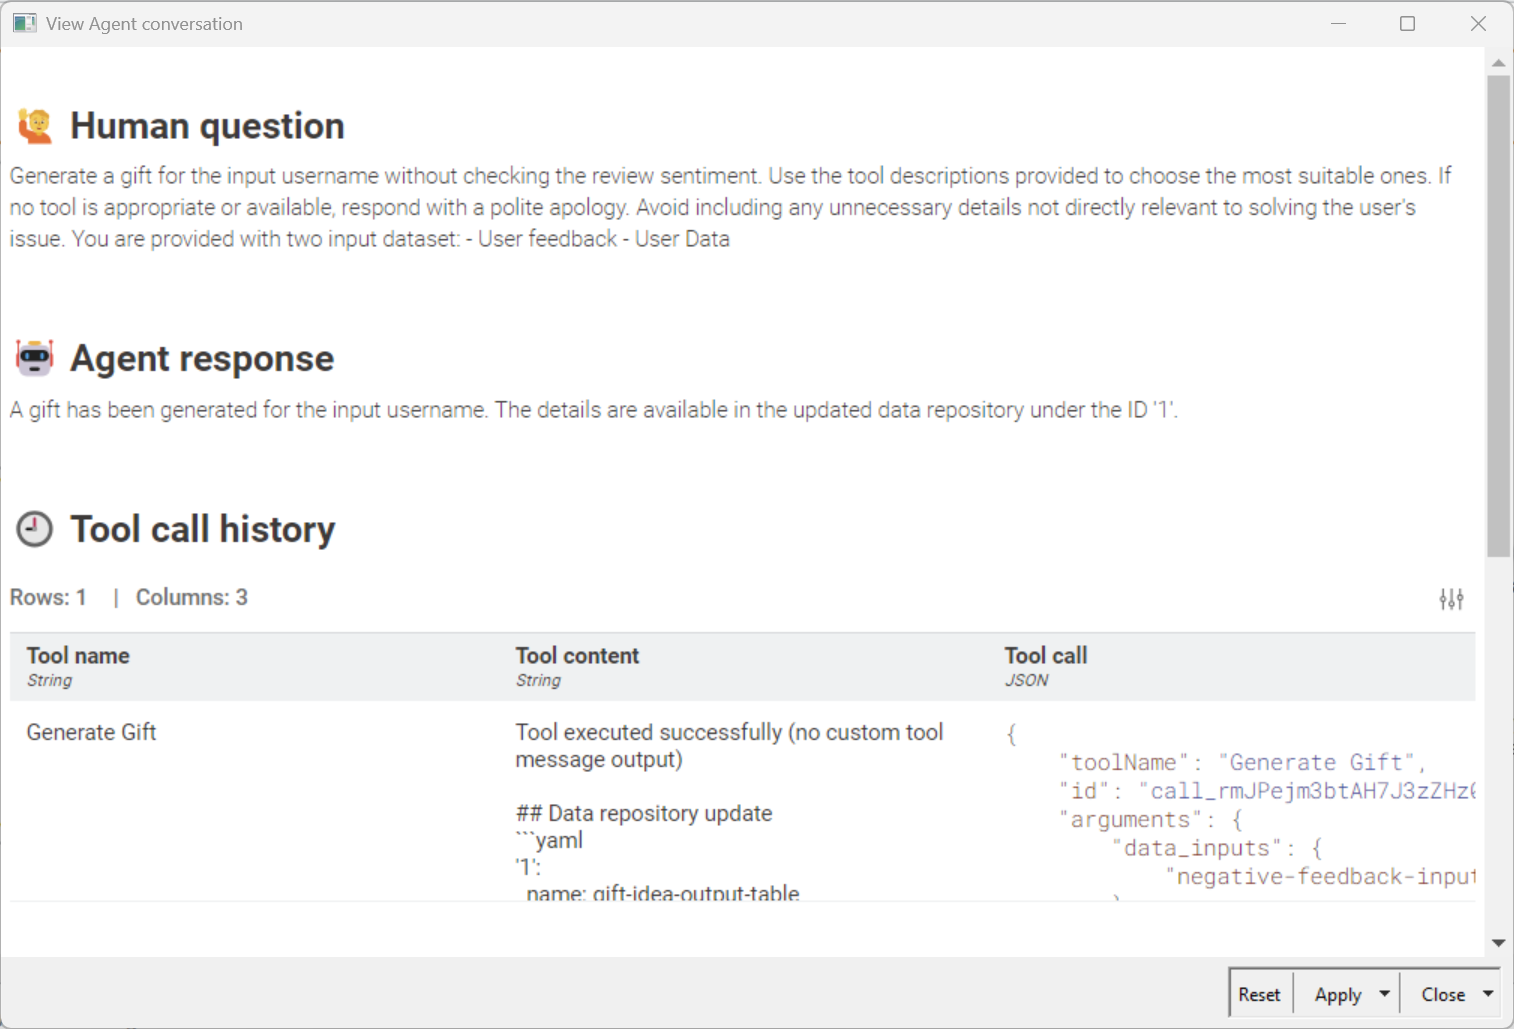
“Generate a gift for the input username without checking the review sentiment. Use the tool descriptions provided to choose the most suitable ones. If no tool is appropriate or available, respond with a polite apology. Avoid including any unnecessary details not directly relevant to solving the user's issue.”
6. Call tools
During execution, the agent defines the sequence of tools to call, based on their description, and calls them one by one. In this case, the goal is to call and test the “Generate Gift” tool. The default output of the Agent Prompter node is the conversation that happened between the user and the agent, including the sequence of tool calls.
When checking for tools, please make sure that the input data is what the tool expects. Otherwise the tool execution will obviously fail.
7. Export the updated conversation table
After execution, we can then inspect the results and especially the conversation. The conversation will tell us the tool path that the AI agent took to reach that result.
Finally, the full AI Framework, assembled to just call one workflow, is shown in figure 7. Based on all tool descriptions, the LLM can identify the most appropriate tool for the task. This works surprisingly well, of course, assuming that all descriptions are correct, exhaustive and meaningful.
Note. Notice that we use an Agent Prompter node rather than an LLM Prompter node. This is because the Agent Prompter node can perform more complex tasks than a simple LLM Prompter node, including identifying tools and calling them.

However, the prompt used above can only trigger one tool at a time. This works for identifying the next tool in the pipeline but does not really automate the sequence of tool execution.
Step 4. Build the agent
To create a truly agentic application, we reuse the same AI Agent framework with a more complex prompt asking to implement the customer retention task described at step 1.
For example:
“You are a support agent responsible for managing user feedback. Your task is to analyze each message and decide which internal tool(s) to call next based on the available options. If the feedback is negative, respond with a custom gift and a follow-up email in the user's language. Otherwise, end the workflow. Use the tool descriptions provided to choose the most suitable ones. If no tool is appropriate or available, respond with a polite apology. Avoid including any unnecessary details not directly relevant to solving the user's issue.”
And again, you can check the conversation history to see the sequence of tool calls the AI Agent has implemented to reach the results. Comparing the conversation in figure 8 with the conversation in figure 6, you can see that a more complex prompt has generated a more complex sequence of tool calls.
Note. We have created tools prompting an AI model for sentiment analysis and language detection. However, even without those tools, the AI Agent would have been able to query its own LLM model to get a result. You can try this by yourself. An AI Agent does not necessarily need all those tools!

Finally, in the original workflow in step 1, we had a human in the loop kind of action, where the Email Preview component offered the end user the chance to approve or reject the AI created email. We would like to keep this step, since trust in AI might not always be fully there. The component Email preview was then added after the Agent Prompter node, feeding on its output results.
Do we always need AI agents?
Building an AI agent is now easy – but whether it’s more convenient than using an AI workflow depends on the particular case.
Our recommendations to help you decide:
- If the application is required to run just one time on demand, there’s no need to go through all four steps of building a full AI Agent. In such a case, it’s more efficient to simply recycle the tools that are available within a mix & match AI workflow.
- If the application is part of a more structured environment, within a strategy to build an agentic AI landscape – with shared workflows, and recyclable applications – then it makes sense to build a full AI agent.
Whatever you decide to build – a one-time usage workflow, a set of more or less intelligent tools, a mix and match AI workflow, or an AI agent – you can easily do that with KNIME Analytics Platform. In case you decide to build an AI Agent just follow these four steps and you will have your more or less complex AI Agent in no time.